063. Documenting Artwork
Documenting your work is so important, whether you are a hobbyist or a full time artist. You use images for your portfolio, shop, and social media. Having consistently good images will put you and your work in a better light (pun)!
For those of us who are trying to build our business and make a living through our artwork, it's essential that we make it look as professional as possible!

First, decide between using a camera to capture your work or a scanner.
For me, that was an easy choice. I come from a photography background, so I already had the knowledge and camera required for good photos. But even more importantly, I often paint very large - sometimes up to 4 feet paintings, and those cannot be scanned!
If you want to scan your artwork, but you don't own a large scanner, you'll need to find a local print shop who can scan large artwork, and they have limits (and it can be pricey).
So this information is for anyone interested in photographing your artwork. This is MY process, and it may differ from other artists, but I hope it helps! Everything in my portfolio was a photo taken with my DSLR and cropped/adjusted in Photoshop after.
Anytime I say "canvas" I am referring to your artwork, whether it's a painting, drawing, or sculpture!
Lighting
There are lots of factors to consider when documenting artwork, but lighting is the main challenge. Regardless of your equipment, if you don't understand what good lighting is, your photos will suffer.
USE NATURAL LIGHT WHENEVER POSSIBLE (But not direct sun)
Each type of light (natural, incandescent, LED, fluorescent, etc) has a different color or "temperature" (warm vs. cool)
Natural light falls in the middle, giving you a very neutral color and most accurately representing your artwork's colors.
Most of us have incandescent or warm LED bulbs in our home, which will cast a warm glow. If you absolutely cannot take photos using natural light, using the artificial light available to you is OK because color can be fixed in post production (to an extent). However what is not OK is low light, or using flashes that create a glare on the artwork. Sometimes, the glare isn't just a white reflection, but a color shift within your shadows. This can be hard to notice until you get into post production, and it's really annoying to fix!
To avoid reflections and glare on your canvas, you need to use indirect lighting. This means making sure there are no direct sources of light hitting your canvas. You can do this by angling your canvas in a certain position with your room. Fill the room with as much light as possible. Don't point light directly at your canvas. Begin angling the canvas and really look at the shadows. If you notice they are "lighter" than they should be or have a slightly different color, this means there's a glare and it WILL show up in your photos.
Keep angling until you find a position that works! Remember to avoid casting a shadow on the work from your body, camera or tripod (I rarely use a tripod).
The angle of the photo matters!
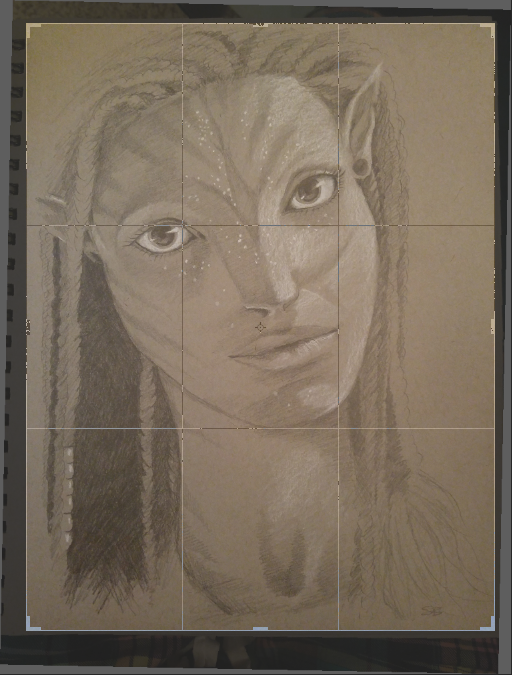
Don't take the photo from a harsh angle (from the side). Position the camera DIRECTLY ABOVE the canvas, keeping in mind that you will need to crop the image. Cropping requires straight lines.
The following examples were taken with my phone (LG G4):
Final image after adjustments.
The last image shows what it looks like after being cropped and the contrast slightly increased.
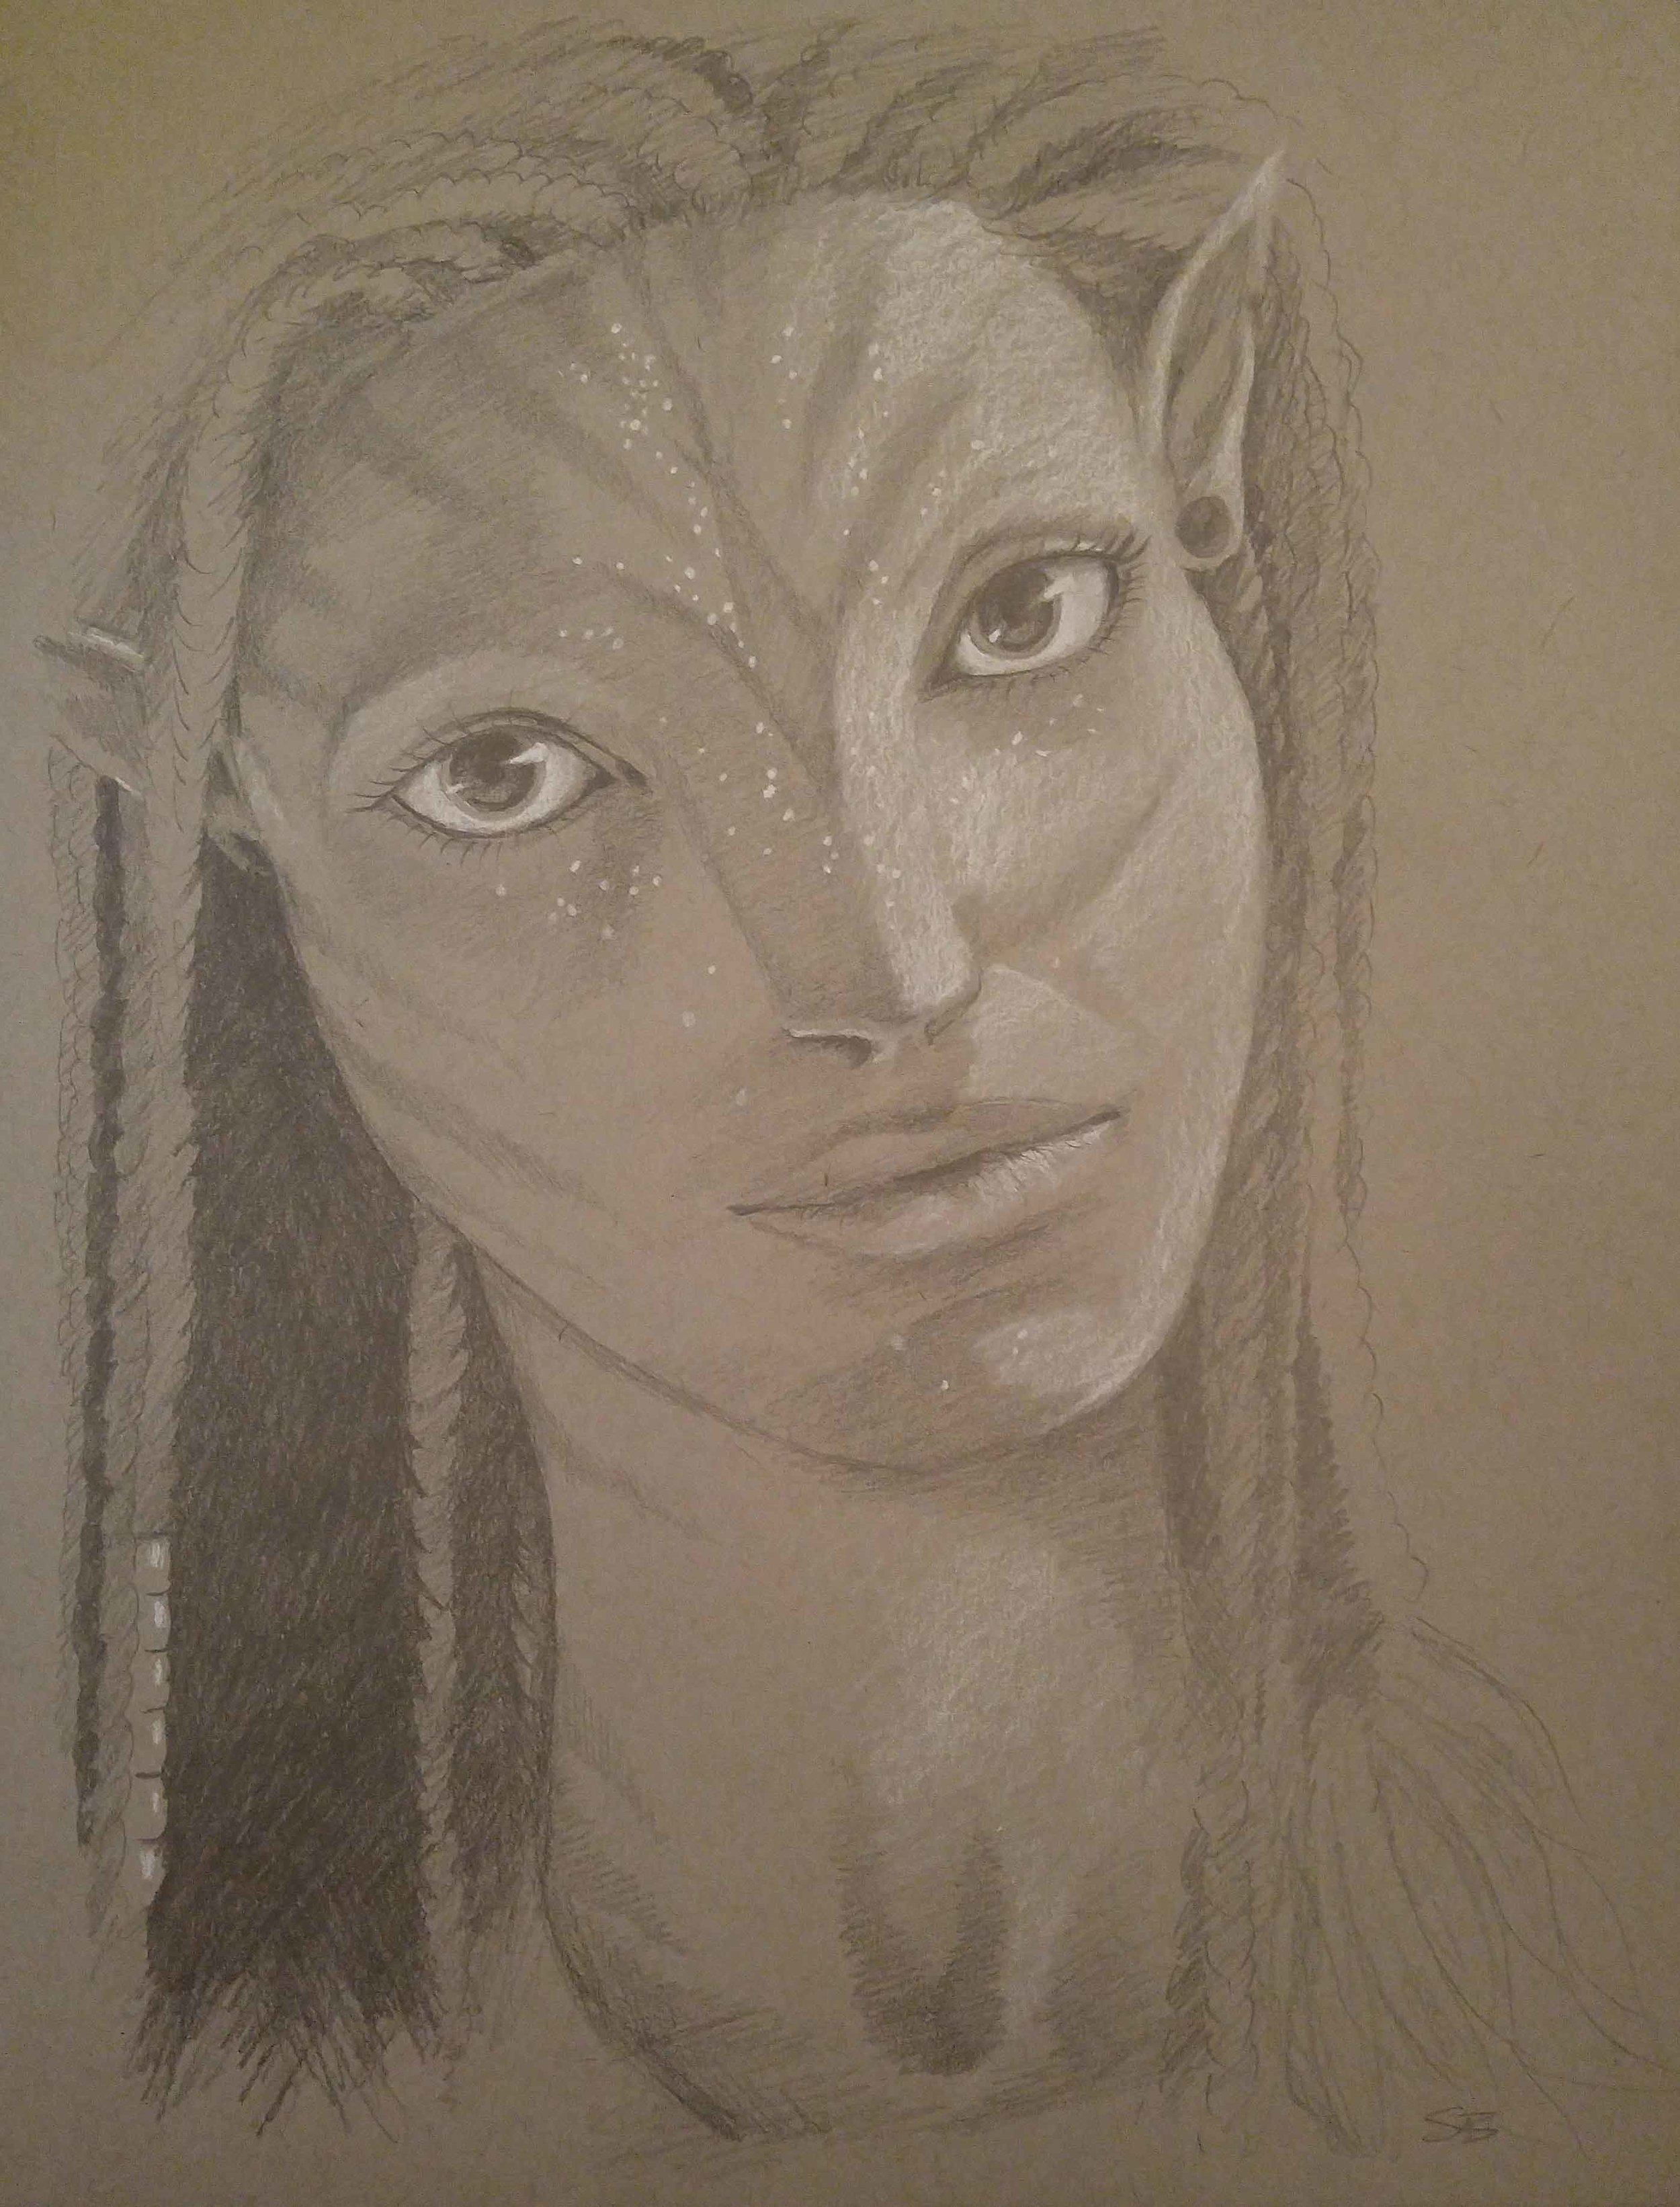
This painting was not complete at the time, but I wanted to use it as an example because it had a variety of colors, contrast, and texture. These things were captured well with my phone and the final image is perfect for twitter or instagram, or even an online portfolio!
DSLR Camera Settings
I always shoot in RAW format (not jpeg) whenever possible.
Most cameras, even point-and-shoots and some phones, have the option to change what file type your images are. RAW format allows you to adjust native settings of the image like exposure, white balance (color), and much more in post production, and it gives you a higher quality image.
Canon: In your camera menu, scroll to the "Image Quality" function and choose RAW.
Nikon: In your camera menu, scroll to "Image Quality" function and choose NEF (RAW).
Keep in mind this will increase your file size, sometimes up to 30mb per image. However it provides the purest, largest, highest quality image, which will allow you to make large poster size prints of your images later if you want!
If you don't have the option for RAW, use the highest jpeg setting available.
Use a high ISO in order to allow as much light into the sensor as possible. If your shadows are "grainy" that means you need more light in the room and a lower ISO (increasing the ISO too much will cause grain).
MAKE SURE THE PHOTO IS IN FOCUS! Stay as still as possible, and take the image directly from above so that every part of the canvas is in focus.
Using a Phone
I have the LG G4 phone, and I chose it specifically for the camera. It allows manual settings as well as RAW format! It takes incredibly crisp images and does a great job handling low light.
You can take perfectly decent photos for your portfolio and social media with your camera phone.
(See above examples)
The area that it lacks is usually resolution/file size. If you plan on selling high quality prints of your work down the line, you'll need very high resolution, large files which phones don't always provide. Just keep that in mind.
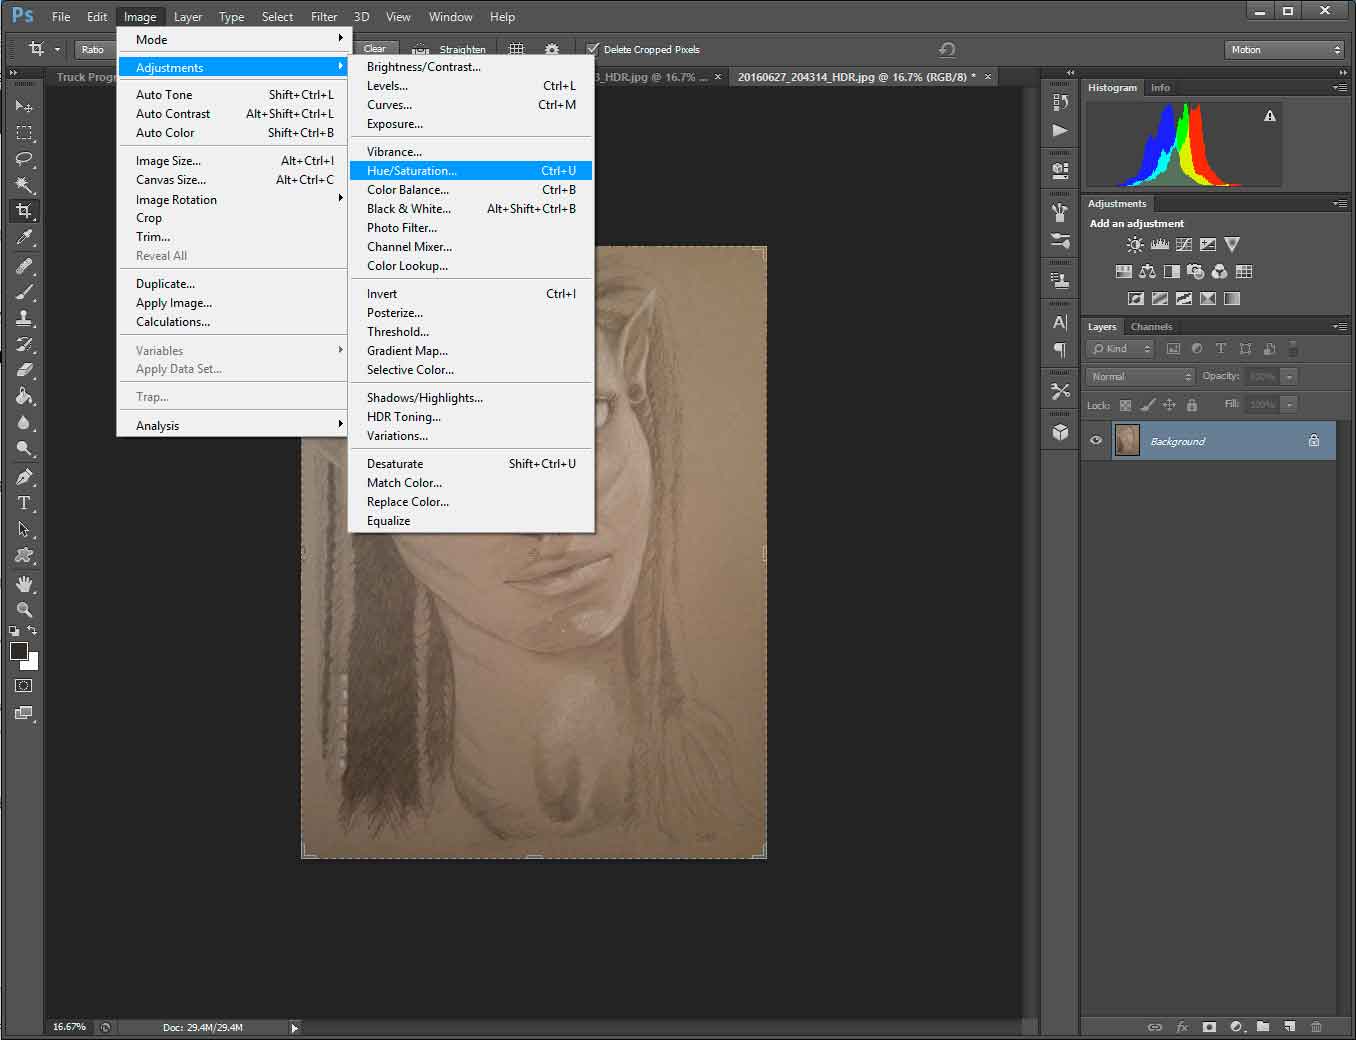
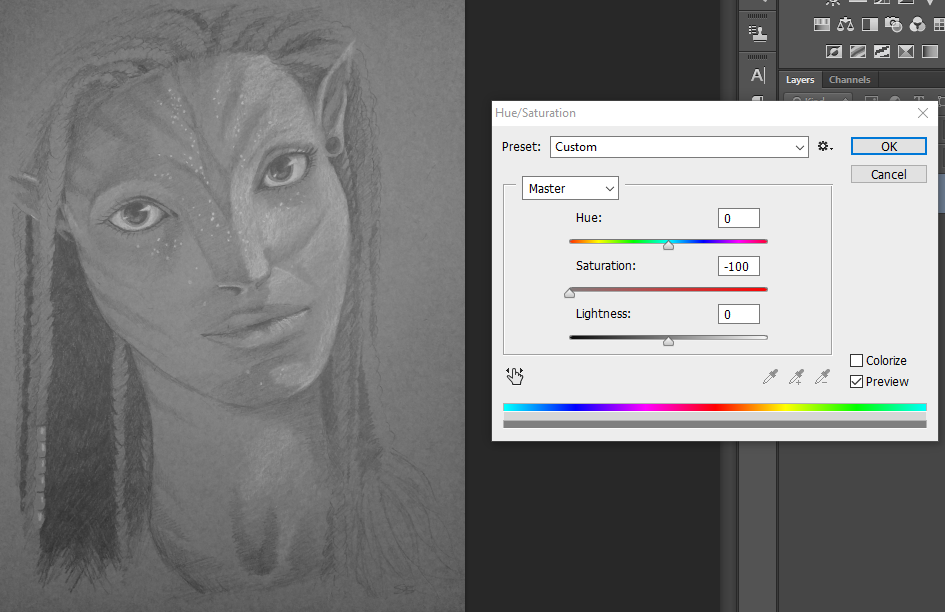
Post Production
After you take the photo, you will need to make adjustments and crop the image to match the borders of your artwork.
I use Photoshop CS6, but you can find other photo editing software out there. Just make sure it allows you to edit RAW images if you use that setting.
When you open a RAW file, it will first open in Adobe Bridge. This allows you to adjust the native settings of the image like exposure and color. If you have a jpeg, open it directly in Photoshop or whatever software you have. You can still adjust these settings in a jpeg to an extent.
The main things I do are:
- Crop
- Adjust saturation or colors
- Adjust contrast (using levels or curves)
Social Media
Like I mentioned before, a lot of times using a phone to capture images of your work for social media is perfectly fine, just try to keep lighting, angle, and quality in mind! The more you post consistently good quality images, the more your work will attract others. Posting poorly lit, horribly yellow, or grainy photos of your work just makes the art and your brand look BAD! Give yourself the best chance possible by taking a little extra time and pay attention to the details.
Progress Pics are an excellent way to show off the unique aspects of a medium, whether it's painting or drawing, or whatever! People love progress pics!
Instagram currently offers the choice to upload multiple images to one post, so you can show individual progress photos or closeups of your piece.
Note: For the multiple photo feature, the app auto-crops them to a square, so make sure you take the image from far enough away/the correct angle to fit within a square.
Twitter allows you to upload 4 images at a time, which is also an excellent way to show details or progress shots.
You can also have fun and get creative with your compositions.
Multiples or closeups don't have to be boring!
If you have any specific questions, please message me or leave a comment below! I'd love to help you reach a level of quality you are proud of!