Artists & Social Anxiety, Part 1 - Plein air painting as art therapy
Read More078. Artists & Social Anxiety, Part 1 - Plein air painting as art therapy
in Video, Artist Diary
Artists & Social Anxiety, Part 1 - Plein air painting as art therapy
Read MoreWhy studies are an important part of your artistic breakfast.
Read More
Finding my way through the crazy world of being a self-employed artist.
Read MoreMy bags are packed and I'm headed into the mountains!
I've never done this before, but I decided to book a little cabin in the woods for 72 hours of remote inspiration devoted purely to writing!

I'm hoping to come back with a rough draft of a few chapters, maybe some sketches and a layout for my first email newsletter!
Sorry the blog has been so quiet lately - as I mentioned in the last post, I've never been more busy.
Here are some photos from last summer - the same location I'm headed today!


I know... I'm the worst! I have been so bad since returning to Denver about updating my blog and making videos.
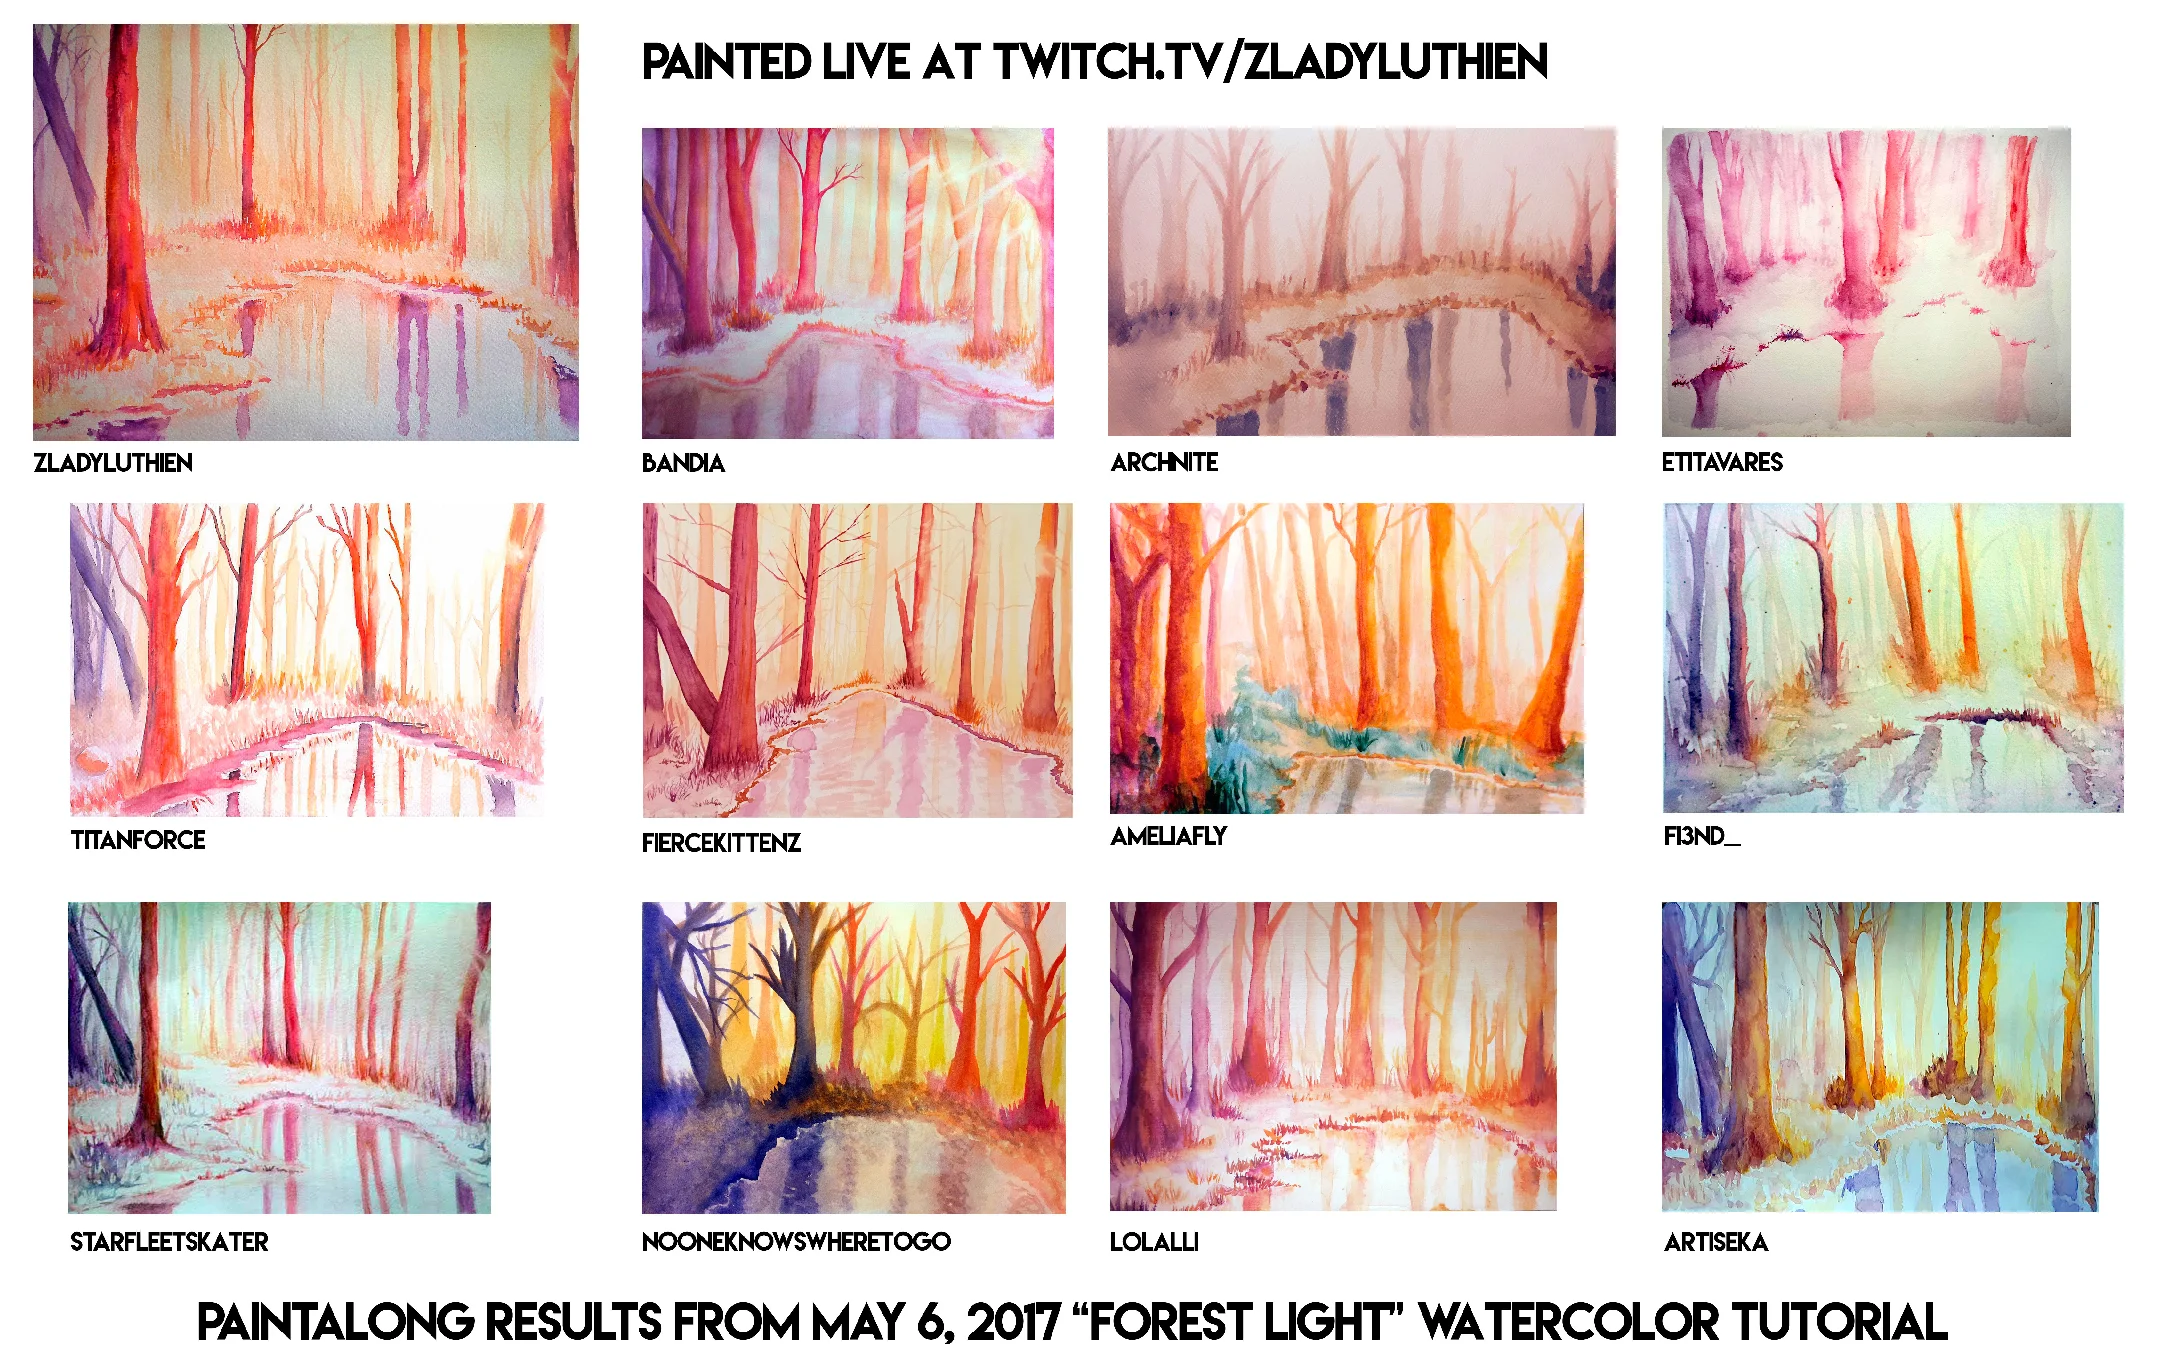
In my defense, I've been REALLY busy with fulfilling Patreon orders, Paintalong tutorial (see results here), streaming, writing my book, studying, collaborations, commissions, and continuing the quest of selling/giving away my stuff.
All good stuff, business-wise.
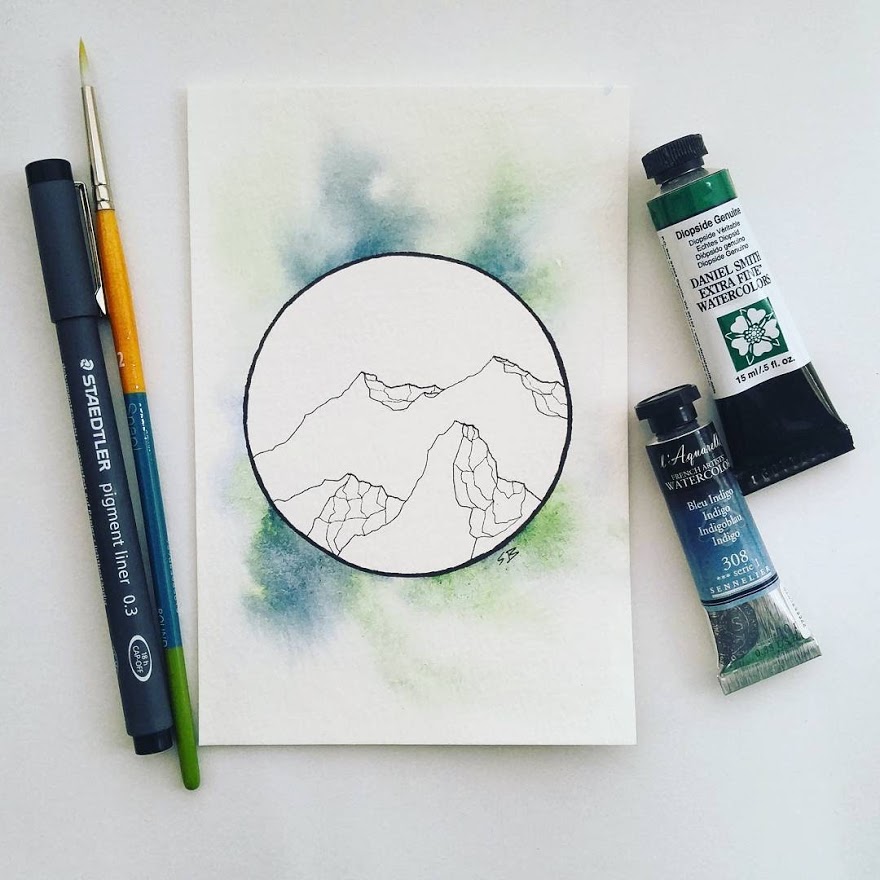
So here's a new tutorial video for those of you who are learning watercolor!
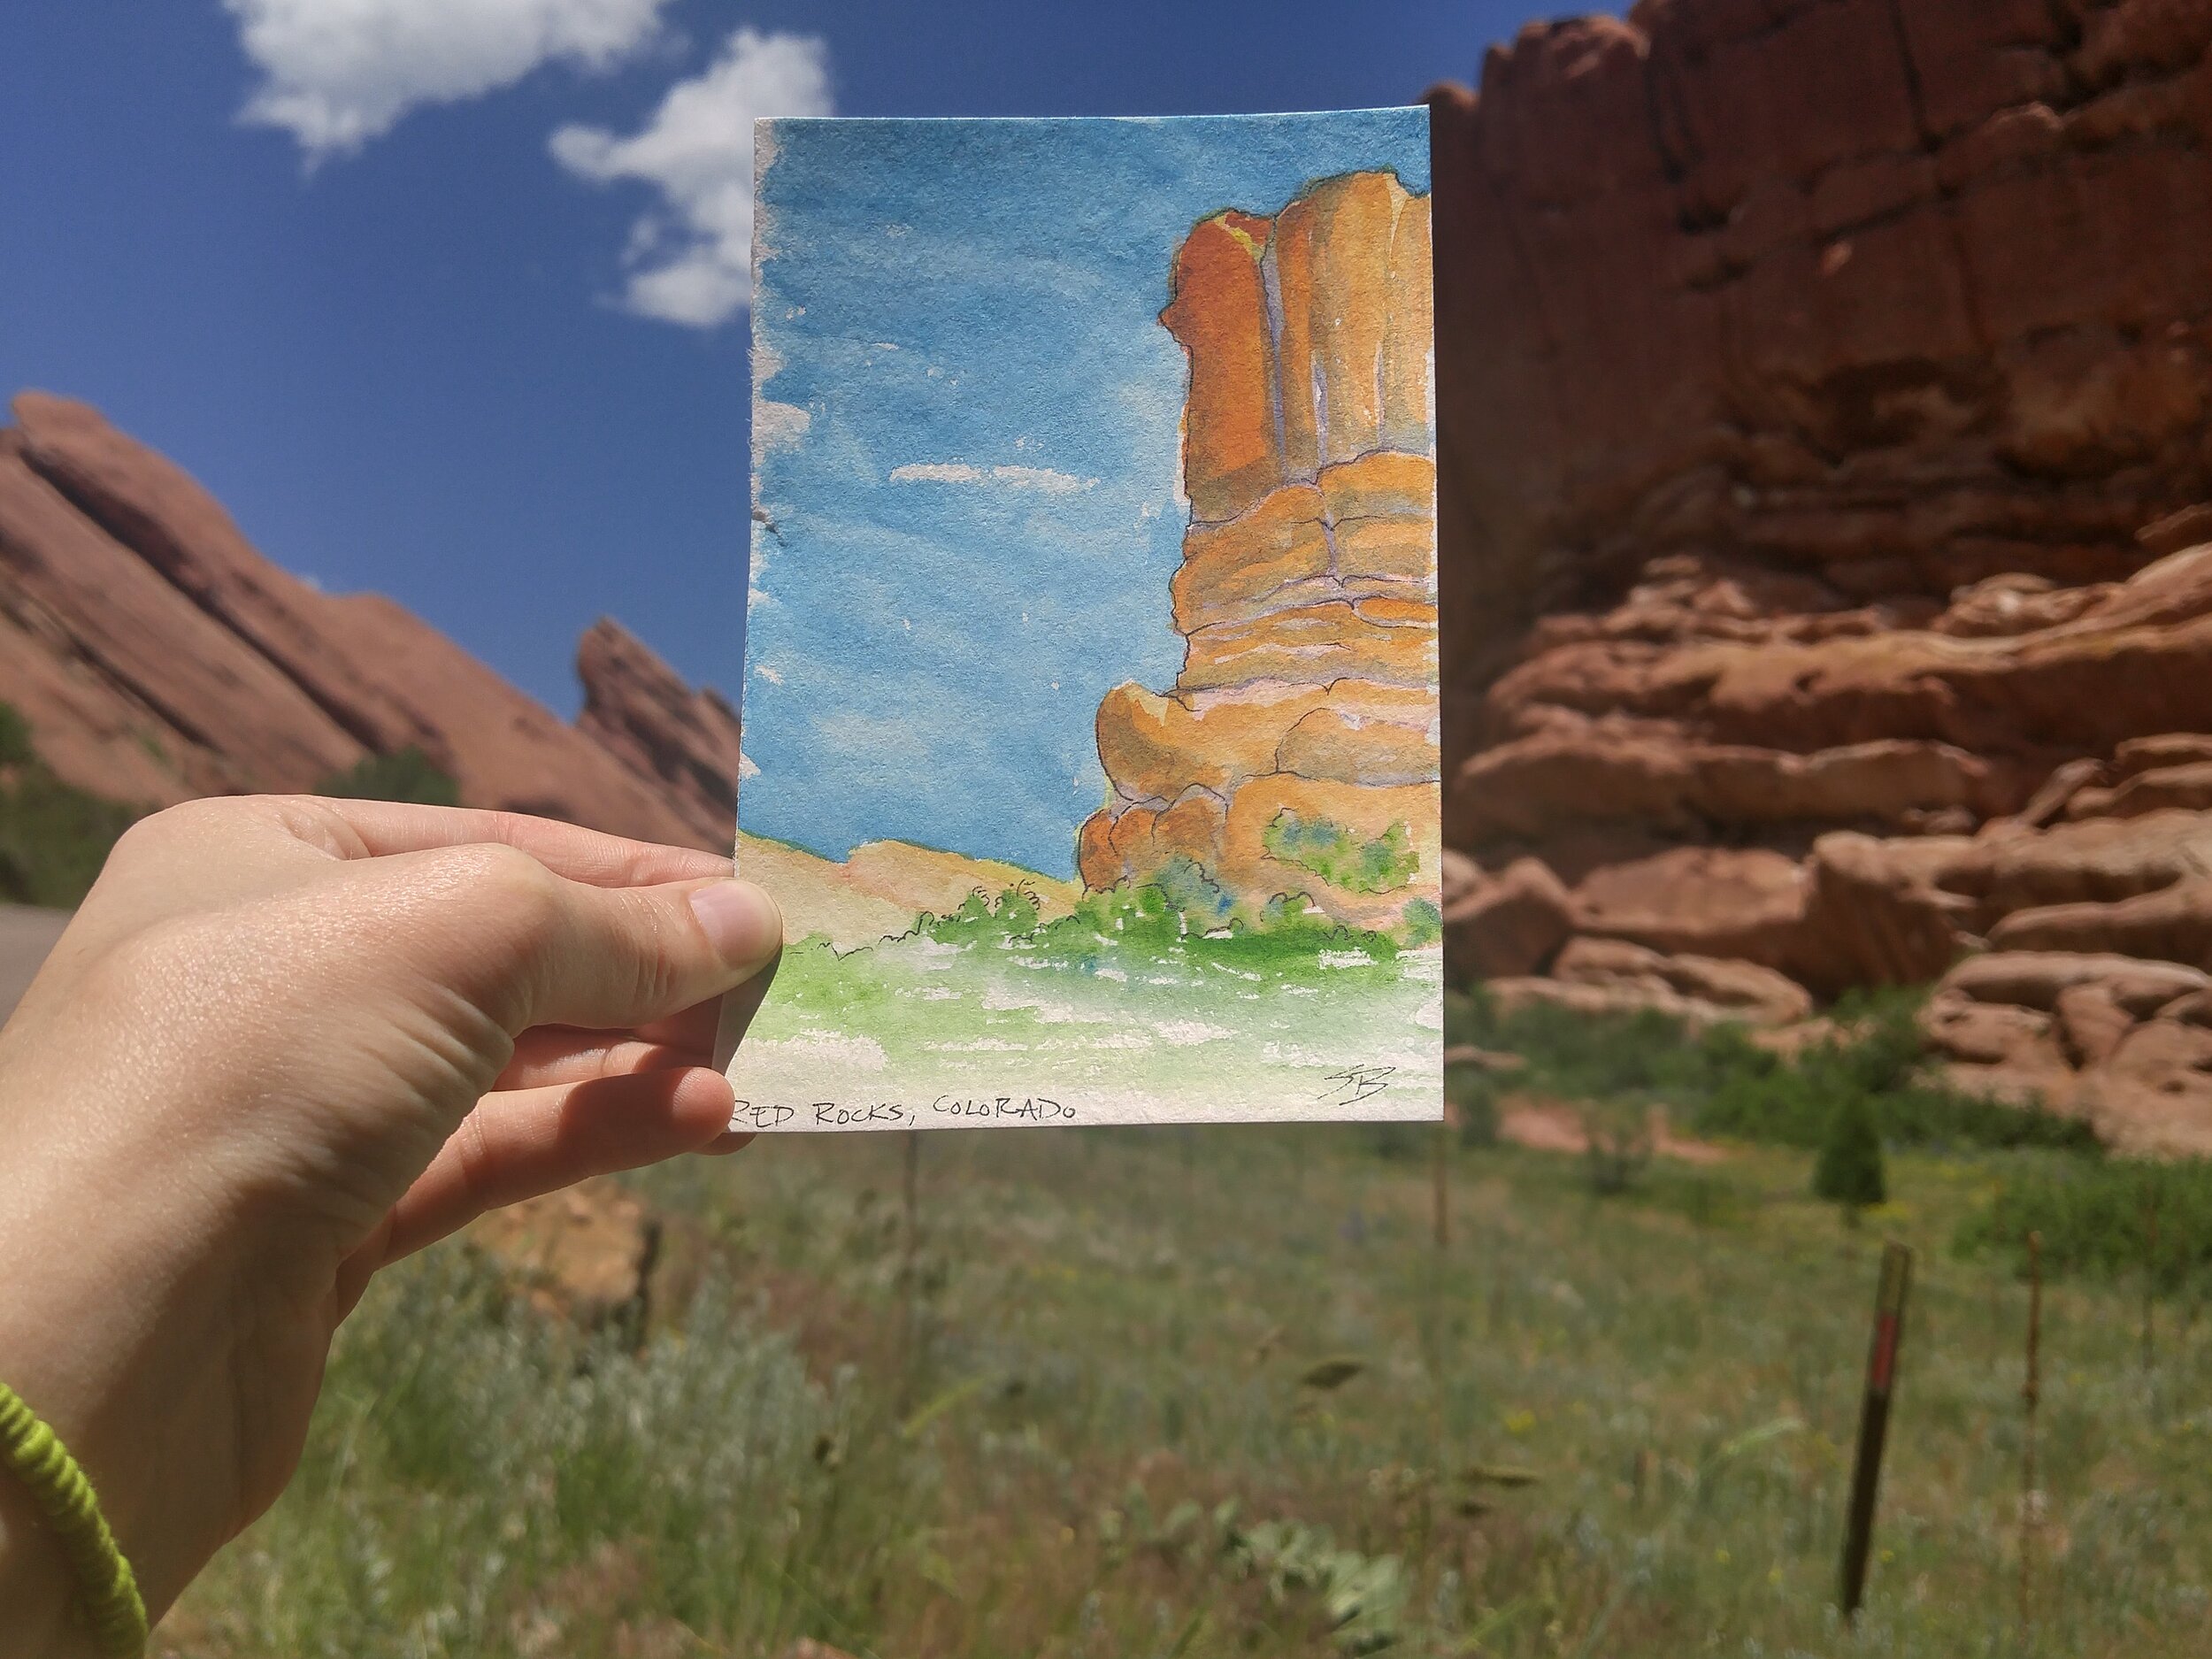
In this video I talk about the benefits (and tricks) to painting on a small scale - something I do daily. I go through about 100 watercolor postcards a month, and it's VERY different than painting large. They are so great for studies, giveaways, gifts, etc. and really force you to look at minimizing a landscape to it's base elements.
When I'm painting these, I often ask myself "What are the minimum amount of brush strokes required to bring the landscape to life?" And what can I actually fit without making it too "busy?"
And just for fun, here are a couple images from recent projects and work around the studio.
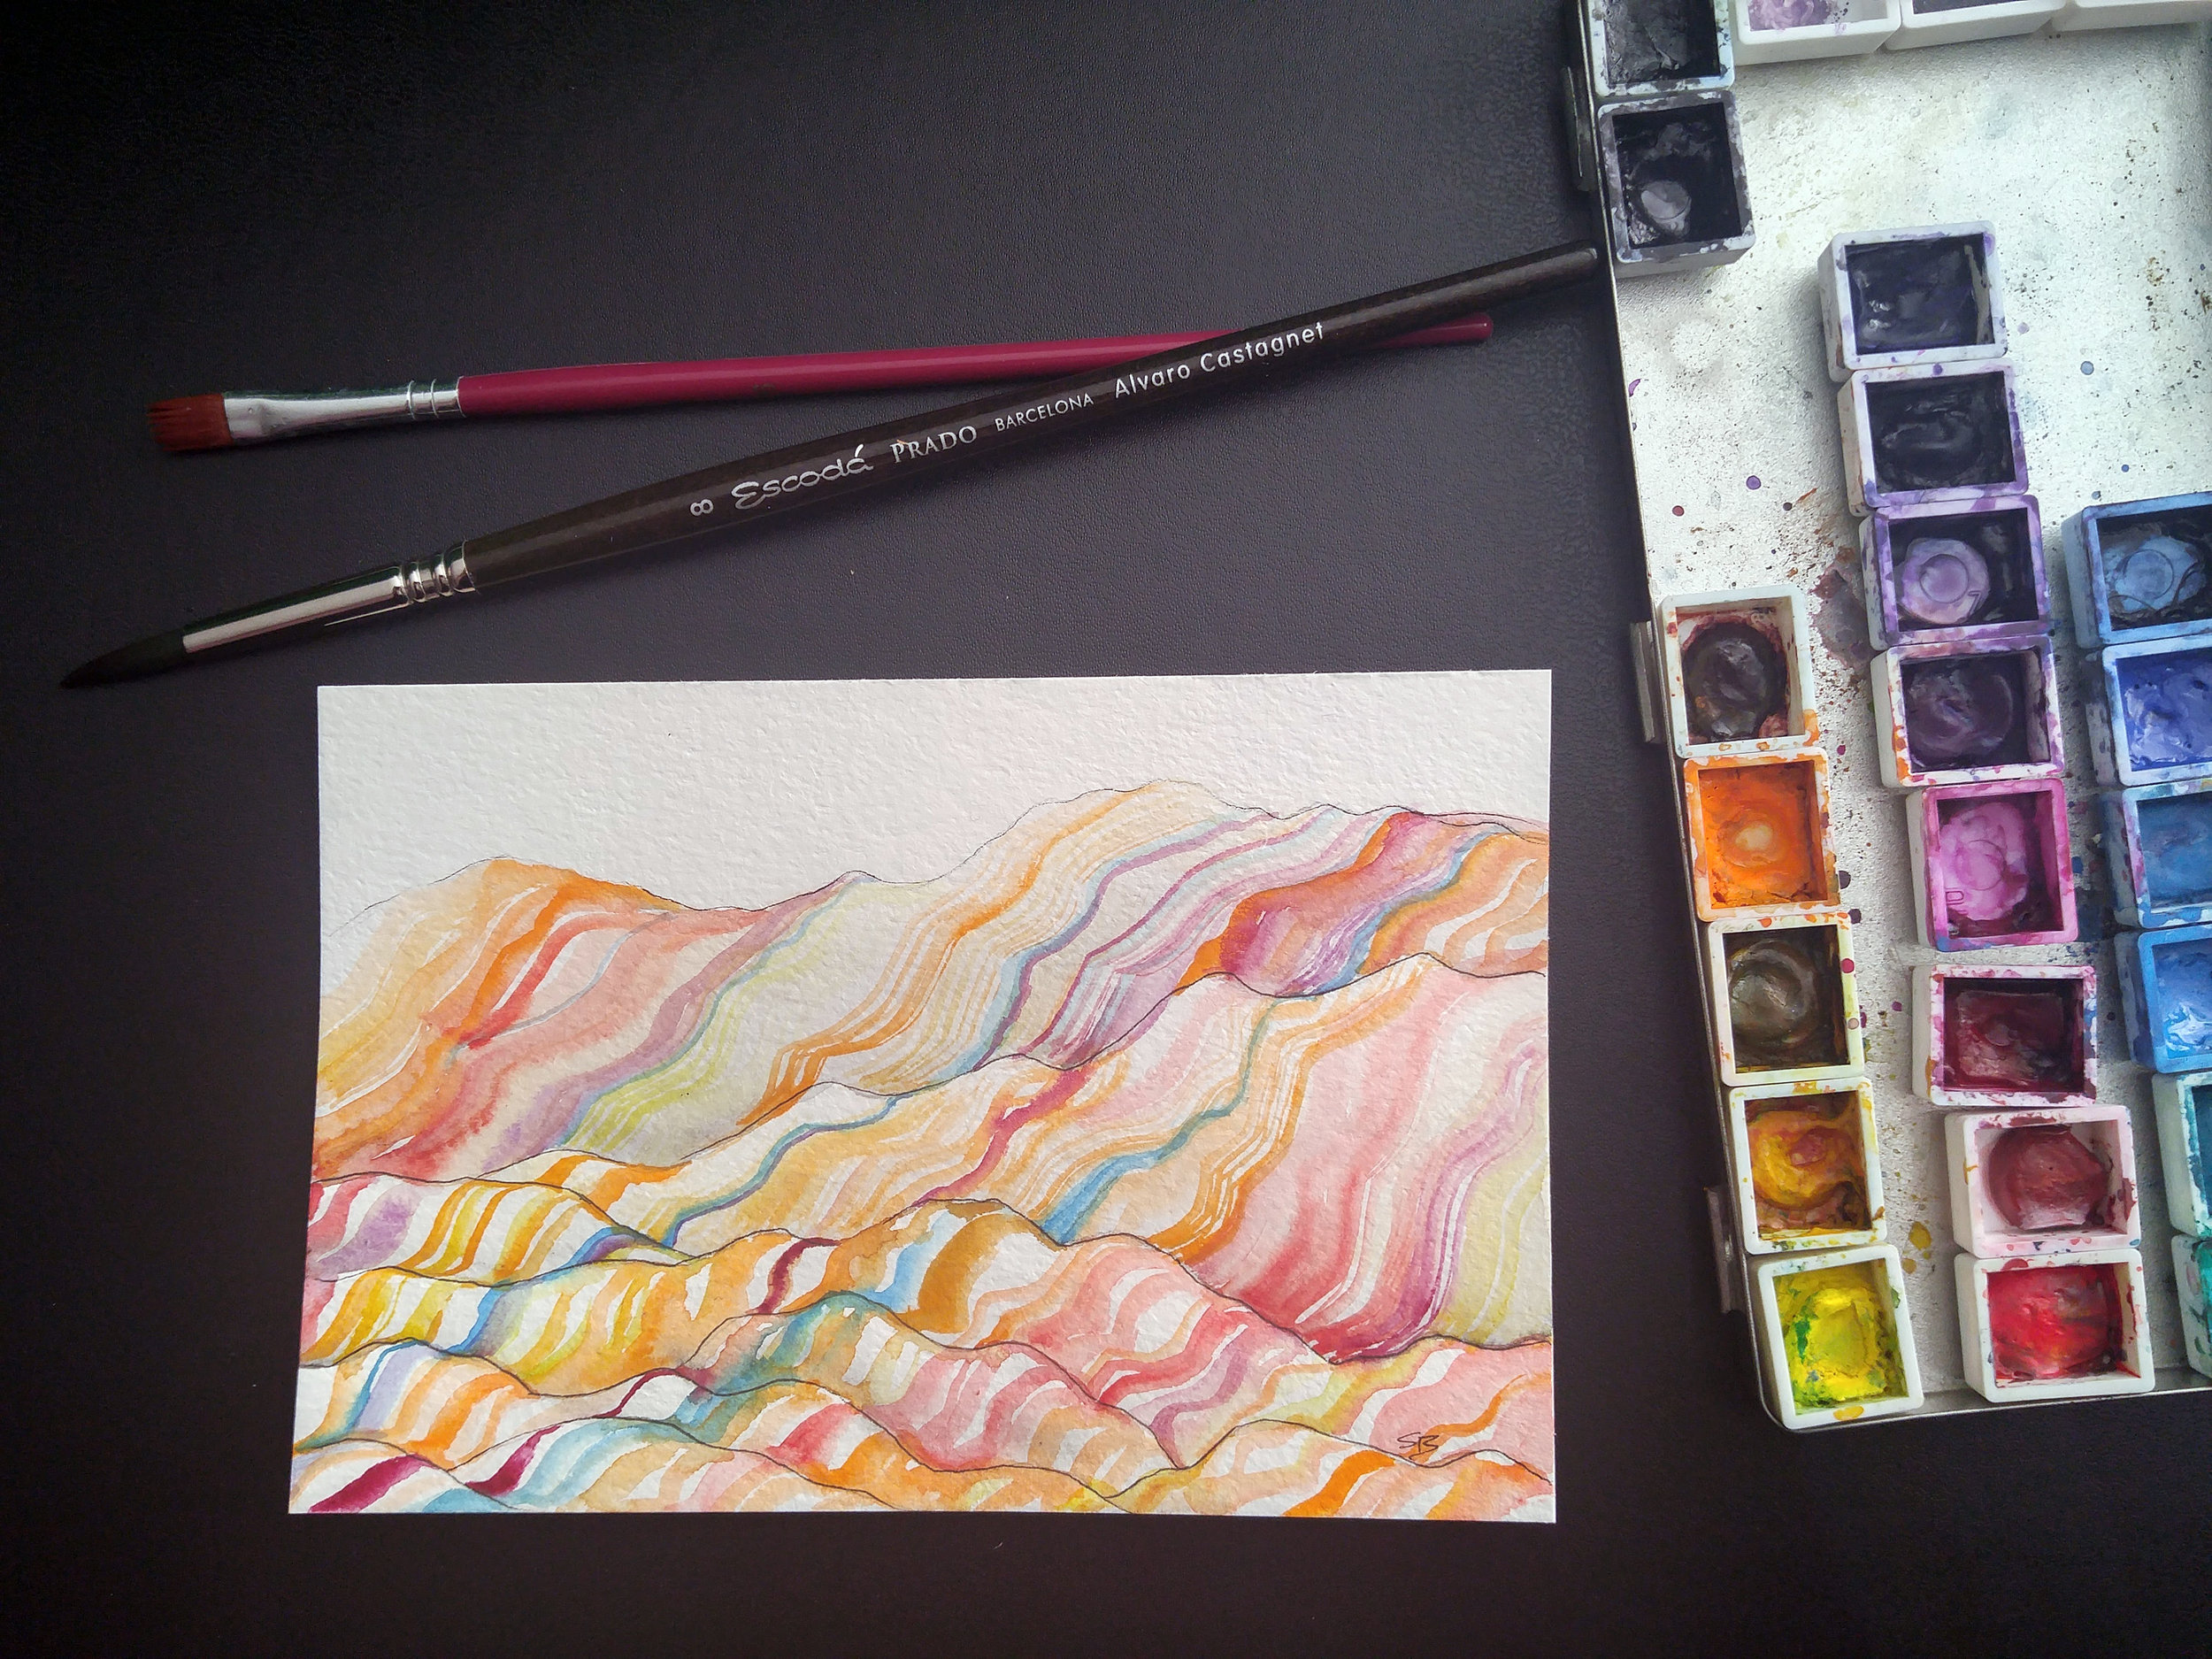
Chinese Rainbow Mountains... probably one of the hardest mountain ranges I've ever painted. It feels so abstract!

Dolomites, Italy (practicing minimal brush strokes)
The theme for May Patreon postcards!
Plus so much research, writing, and illustrations for my book! If you want to find out more about that, visit the official website and see previous blog post!
I missed my Friday deadline, but I have a good excuse!
I flew back to Denver on Sunday, and have been spending my days unboxing my storage, visiting friends I haven't seen in over 6 months, and preparing to start a new stream schedule for my summer in Denver.
I've also been compiling the required documentation to apply for my fiance visa to return to the UK.
It's all pretty overwhelming, but at the same time, I remain positive, and just know that in the long run this will be for the best.
So all in all, it's been a hectic week, but I still try to find a little time each day to paint.
It's the only thing that keeps me grounded.
Here are a few plein air sketchings from this week.

Note: This post is geared specifically towards artists!
I am writing this from my personal experience, which is from an introverted artist who makes a living online (who has never shown or sold anything in a gallery).
It is written for those who want to transform their social media platforms into tools that will help them succeed.
To diversify the research shared here, I asked a fellow artist for some input, who has seen incredible success through social media: Kay Pike Fashion. She ended up making these AMAZING, helpful visual diagrams sharing her story of how she grew to 270K+ followers in 1 year! (Thanks Kay!)
Twitch.tv/kaypikefashion
(Click the links in the descriptions below each image to see the full version)
One final disclaimer: Don't take the advice here, or any advice, as the only way to do things! There are so many methods to grow your following, and while lots of these tips are universal, you might find a totally different path that works for you. This is meant to help get your started, get you thinking about the options.
The Basics of Social Media and Why It's Important for Artists to Understand the Innerworkings
It's rare to meet someone who doesn't have at least one profile on a social media platform.
So, hopefully if you are reading this, you have at least some idea of how social media works.
At it's most basic: You create a profile, people "follow" your account, and can interact (either by commenting or merely "liking" a post by clicking a little button).
But did you know that almost all social media platforms are using algorithms which prioritize posts that have higher engagement? Or that the time of day in which you post something can have a huge impact on how much interaction it gets (or whether it gets seen at all)?
The days of simplicity for business owners died when the internet was born. We are social beings, and it was inevitable that social media would develop and become a huge part of our lives and businesses. For businesses to thrive, it's essential that they connect with their users/consumers on a personal level. For artists, this resonates even deeper. Our art is incredibly personal, and we don't want to be seen as just a product.
If selling work or being a well known artist is the treasure chest, then social media is the treasure map. Navigating it can be tricky, but there are lots of strategies that work on many platforms!
You can survive the trek, or you can thrive. You can learn to use social media as a tool to help your business grow.
And yes, you are a business. An artist who wants to make a living off of their art needs to consider themselves a business. To be honest, I hate the business side more than anything, but since I've faced the music, my business started to thrive and I make a humble living as an artist. I could be doing a lot better if I put more effort into marketing and such, but I already feel overwhelmed by my to-do list most days. So I do what I can, and that little amount goes a long way!
If you are in the same boat, just know that you CAN be a successful artist while still maintaining some distance from social media. It doesn't have to completely consume you.
I should note that social media is constantly evolving. By the time you read this post, there may be a totally new platform being born, or a major change in an existing one! But over the last two years, I have noticed some constants that helped with my growth, and have been confirmed by fellow artists.
Here's everything I know!
1. Decide Where You Want to Post. What is your purpose?
Since there are SO many social media platforms, especially for artists, it can be daunting and exhausting to try to grow on every single one from the start. In fact, you may end up spreading yourself too thin trying to use all of them, which would take away from your craft. You can waste a lot of time and energy if you don't know why, what, where or when to post things.
The main social media platforms for artists at the time of this post are (in order of popularity starting with Facebook): Facebook, YouTube, Instagram, Tumblr, Twitter, Pinterest.
In this blog post, I will discuss Facebook, Twitter, Instagram, and YouTube.
Being an artist, and even more so making a living as an artist, is already exhausting. It's not just about painting/drawing/etc. - that's a huge part of it, but you also have a huge daily to-do list: documenting your work, updating your portfolio, answering emails, fulfilling orders & commissions, packing/shipping, networking, etc.
Now add keeping up a consistent presence on social media to the list - and it sometimes feels like there's no time left to paint!
As a one-person-show, you need to maximize your time and use your tools efficiently.
When deciding which platform to grow on first, consider what type of art you do and whether it is conducive to that platform. Decide what is most important about your brand/business. What do you want to tell/show the world?
For instance, if you are a painter, you can usually get by with posting photos of your work and engaging with users on all of the platforms, so you might as well choose the most popular - either Facebook or Instagram. If you are a 3D Graphics artist, maybe YouTube is the best for you but you will want to cross-polinate (see #7).
Word of mouth is huge for artists, and almost everyone uses Facebook, so it's a natural way to network, especially to people who may otherwise never see your art.
Note: At the time of this post, I barely use Facebook (I stepped away a few years ago because I was becoming too consumed by it. At the moment, I only update it like twice a year.
I KNOW I would get more business if I used it to share my art. In fact, whenever I DO post an update, I usually get one or two sales/commission requests. And that's only from super rare posts! I know many artists who thrive using Facebook, and it's an AMAZING tool. I used it exclusively several years ago for my photography business and was very successful. While it's not something I use that much at the moment, I highly recommend it to other artists!
I have a slightly different story of how I grew my social media - something that the average artist may not experience. I started out on Twitch.tv - which is mainly a video game platform, but on a fluke, discovered the Creative community there. About two years ago I started streaming my art process (people can watch me paint and interact with a live chat system). There are millions of users on Twitch, and while most of them are there to watch people play video games, a small percent watch the creative streams like mine, and that small percentage was way bigger than I imagined. Within one year, I had 10,000 followers, and from those followers, my other social media platforms grew by word-of-mouth. I now have around 2,000 followers on both Twitter and Instagram (the only other social media platforms I use). That's not a lot, but it's enough for me to do this full time.
Between Twitch, Instagram, and Twitter, I make a living as an artist. (There's also Patreon, but I don't consider that a social media platform...yet. People don't just hang out there and share stuff. They go there specifically to support a user.)
As I mentioned before, I make my living solely online. I do not show or sell my work in physical galleries.
(I want to...someday)
Anyways...without Twitch, I would never have grown on the other platforms this quickly.
I was able to pour ALL my energy into my art streams on Twitch, while simultaneously growing on Twitter and Instagram. Now, if I suddenly stopped streaming on Twitch (which isn't happening), I would have a larger following on social media to work with, and I could pour all my energy into those.
Final thought on this: to truly maximize the potential of a platform involves tons of engagement - like several times a day on each one. Not posting several times a day, but interacting. That's why I emphasize starting out focusing on one or two until you get your feet wet.
2. Quality over Quantity, and be Consistent!
Be careful with "over posting" on your platforms. You can end up desensitizing your followers, OR drive them away with unrelated posts. For example, if you are growing your following on Facebook by mainly posting photos of your artwork, announcements about sales, or links to your shop/website, posting once every other day is a great way to keep everyone informed! Posting once a day can also be great, if you vary your content. Posting two or more times per day, or posting a lot of random things, like a photo of the burger you had for lunch or your political views, is going to over saturate and maybe even turnoff your followers.
(Rule of thumb, don't mix business with personal hot-button topics like politics).
I post on Instagram at least once per day, and for the last several months, have had steady growth. But the thing is, I paint and draw a LOT, so I have a huge pile of work to share. I don't just post for the sake of posting. If I didn't have anything worthwhile to share, I wouldn't. It's much more important to post consistently interesting work than some shite that lowers the average quality of my shared work. Yes, I make some shite art too, but I don't have to share it. It's part of my learning process. Sometimes I DO share it just to show people the process.
Just remember what you put out in the world represents you.
People crave consistency as much as quality. Consistency is very important, not only in terms of WHAT you post, but when you post. For example, you will start to gain a following, and those followers will expect that content from you. If you post a painting every day for a week, those followers will start to expect that consistency. If you suddenly post a photo of your breakfast, you will notice a big difference in the engagement (and you may or may not lose followers). It's your account, you can do whatever you want, but just remember that most people want consistency. (Don't worry about losing followers here and there...it happens!)
Same goes for timing. Try to post at a consistent rate. If you feel you can consistently post once per day, great! If you are posting 2-3 times per week, that's good too. People look forward to your posts and trust the consistent timing. In my experience, people DO unfollow and engage less per post when I post less frequently/sporadically.
3. Time of Day Matters
There are tons of articles about this online already, but the basics are this: Most social media platforms (especially Facebook, Twitter and Instagram) use special statistical algorithms that organize your "feed" for you, based on what they think you want to see. So, your timeline or feed doesn't show posts chronologically like they used to. The order is a result of many computer algorithms at work, analyzing everything you like/comment on/follow in order to make your life "better."
Better? I don't know about that. I don't like a computer making those decisions for me. But...this is the reality of our technological age.
The algorithms take into account how quickly your post gets some sort of engagement after you post it (likes/follows/comments) and those posts filter towards the top of someone's feed/timeline. So, the popular stuff gets seen first/more.
If you want your post to be seen more, you should post it during a time when people who follow you are more actively using that platform. There are lots of sites that post statistics of when Facebook, Twitter, and Instagram have high traffic, and you can find out by doing some searches based on your timezone.
I have been doing tests and really paying attention to mine for the last year or so, in order to discover when MY followers are most active and what time of day works best.
To start out, I highly recommend that you try some tests. Give yourself a three week period. Post stuff in the morning/lunch/night and keep an eye out for when you get more interaction. It will vary based on what you're posting of course, so make sure you give it some time to get a better average.
I've been using @Audiense "Socialbro" app to learn about demographics and traffic. It's free if you have less than 5k followers. It has some pretty interesting stats!
You can use scheduling apps to help ease the burden. For instance, Later.com and Tweetdeck allows you to schedule posts so you can set it up and walk away (Don't forget to interact once it is published).
4. Don't Neglect Your Craft
First and foremost, you are an artist (right?). Continue to grow your skills, and don't lose site of what your craft means to you. Being prolific (creating a lot of work) means you will improve, and you will have more content to share. BUT don't forget... quality over quantity when posting.

5. Customize your Posts for Each Platform
To make our lives easier, most apps allow you to "link" to all of your other social media accounts. So when you post something on Facebook or Instagram, you can instantly share that post on Twitter! Saves time, yay!
The problem with using these built-in sharing options is that they don't utilize the other platform's specific post design.
The lower post was shared directly from Instagram, and includes a link to my Instagram post, but does not include the image itself. I believe it does this to drive more traffic to Instagram. It also cuts off my words.
People are visual creatures. Look at the difference in interaction between that post and one 4 hours later that included an image (which I posted directly on Twitter). It got 2 retweets and 17 more likes. Why? Because it is utilizing the full potential of Twitter's post design - it includes more words and an image.
Don't be lazy like me!
6. Be Engaging & Interactive
When you get overwhelmed, it's tempting to just post things and walk away. And in reality, sometimes that is all we have time for.
However, I've noticed a direct correlation to my growth and individual post success based on how much I interact with users. Both in my own posts (replying to comments) and being genuinely interested in other users and commenting on their work.
Again, we are social creatures. We crave that interaction and it feels GOOD to connect. It leads to richer experiences and relationships. Plus, it just feels better to have genuine connections with people who are interested in what you do (and vise versa).
Don't just be a salesman.
7. Cross Pollination
One effective form of using social media is cross pollination. Since most platforms reward posts that get fast, high engagement, you want to give yours the best chance! Claim your username on all the platforms. You want them all to match! For a long time, I had different usernames on each platform, and this was really confusing to my followers or people trying to find me. I recently changed all of mine to match (although I had to slightly adjust the Twitter name due to character limits). Since then, I've seen faster growth across all platforms.
After posting an image or announcement on one platform, post it on your others!! Remember to format each post for the specific platform, since they all have different design guidelines. You can even link them to each other by posting links.
8. Schedule, Research, Track, and Evolve!
Scheduling and tracking your statistics is another way to grow and stay on top. You can waste a lot of time and energy if you don't know why, what, where or when to post things. Stats help you figure out the most efficient use of each platform.
There are scheduling apps that help take the burden off your daily work load, and here are some good ones, that also include statistics:
Later.com (my favorite, specifically for scheduling Instagram posts)
Tweetdeck (specifically for scheduling posts on Twitter, drawback is it only allows one photo per post)
AgoraPulse (for social media managing - not free, but very powerful)
Hootsuite (for managing all your social media)
Websta (free and helpful for tracking Instagram stats/traffic! - preview below)
Audiense Socialbro (tracking your twitter traffic/demographics)
You can track traffic to your sites with many different apps, but one of the easiest ways is to use Bitly. It lets you shorten a link, which is useful for sharing, and it lets you track statistics about the link traffic. I just started using it and it's super helpful! I've already learned a lot about where my traffic comes from, which helps me know which areas I need to push.
Use your Bitly links anywhere that you share your website, social media, and shop URLs!
For more in-depth statistics, there are sites that go deeper into demographics (a lot of which you need to sign up and pay a premium for anything helpful). You can decide for yourself what is worth it.
As for tracking on Instagram and Facebook, having a business profile automatically comes with some built-in statistics. Twitter has built-in statistics as well (find it in your profile - Analytics)
Almost as important as understanding how to use each platform efficiently, is keeping up with the constant changes!
The teams who run Facebook, Instagram, etc. are constantly seeking ways to improve their platforms and evolve their systems. You have to keep up with their pace. It's not uncommon for a big change to effect how a post performs, or even a drastic formatting change to occur.
9. Summary & Fast Tips
There are many strategies that are the same across all platforms. The main differences come down to the design of each post (since each platform has its own format).
Universal Tips:
Don't take this advice, or any advice, as the only way to do things! There are so many methods to grow your following, and while lots of these tips are universal, you might find a totally different path that works for you. These are meant to help get your started, get you thinking about the options.
Be engaging & Interactive! People use social media to connect, not just get spoon-fed crap. Respond to as much as you can, reply to comments, like/retweet/follow often. Seek out other artists and be genuinely interested.
Visuals, visuals, visuals! On any platform, posts with visuals get more interaction.
Be genuine. Be you.
Don't be spammy or too much like a salesman. Yes, these sites are tools that help you grow your following, but remember there are other humans using them, not just numbers and stats.
Sharing personal stuff is fine on occasion, but don't deviate too much from your purpose. This is your brand and everything you share represents you. If you like the idea of sharing personal stuff and not worrying about what you post, maybe use ONE platform as more of a personal space (for example, I use twitter for both personal and business. I keep Instagram almost all business/art related). As I grow, I will use Instagram exclusively for sharing art.
People crave consistency.

First and foremost this is a VISUAL platform not an informative one. You cannot expect people to read anything you write in your descriptions. Think of it more as an art gallery. When you're walking through an art gallery, do you stop and read every single sign/title/description? If someone reads your description, that is a bonus!
Time of day matters! Post things when your audience is most active (this may take a little testing and research). REMEMBER: The goal is to get instant engagement so your post shows up higher on someone's feed. The faster it is liked/commented on, the more it is seen. It's a cycle!
Use a square crop format
Be consistent with your content and post schedule
Use @ symbols to tag other users or companies/sponsors but don't be spammy. I don't recommend @tagging your peers. I don't recommend using @ in every post.
Use # to include a keyword that people can search for - this is the "search" mechanism for all of Instagram. Use relevant words and don't be too spammy. Use Websta to find the most relevant and popular #'s.
Don't post images with tons of words all over them . It comes across as too salesmany and turns people off. I did an experiment for a month and anytime I posted a photo with words on it, it got waaayyyyyyy less interaction.
Your profile can include 1 URL link. Choose wisely. I often revert to my website here, but sometimes when I share a photo or video I'll link to something specific (like Patreon or Youtube).
You can post videos, but they are restricted to 1 minute in length. Audio is not automatically on for viewers (they have to tap the video to hear it) so don't just rely on audio to convey a message.
Lesson learned: I have trouble driving traffic to my blog and YouTube from Instagram. I think Instagramers don't like clicking out of Instagram. I think it's also because people don't really read the descriptions. Twitter is more helpful for driving traffic to other sites like blog posts.

Posts with visuals get higher interaction. You can include up to 4 images per post. You can also post short videos (1 minute or less), but .gif format works best.
Use @ symbol to link to other users or companies/sponsors but don't be spammy You can also "tag" them in the post.
Use # to include a word that people can search for. This is the search mechanism for all of Twitter.
You are restricted to 140 characters per message
Lesson learned: while my tweets about sale announcements and news get good interaction, more often than not, my tweets about personal stuff and random funny things in my life get way higher interaction. I've come to believe Twitter is good for two things: Spreading news quick, and entertainment.
Your profile is able to contain 1 URL for easy clicks. Choose wisely. Think of who your audience is. For example, almost everyone who follows me on Twitter came from Twitch, so I know they care more about my Twitch art streams than anything else. Therefore my URL leads directly to my Twitch channel.

Post an image, don't fill the description with too much extra stuff. Give it a simple descriptive title and if you must, a very brief description. Use the COMMENTS below the image to post extra information, links to your shop, @tags, etc. (you can format this similar to your Instagram post)
Make sure your About section includes all of you social media sites, your website, and shop URLs. Remember to use your Bitly links for tracking!

YouTube
Videos only
Shorter videos get better interaction and more shares
For the most part, YouTube growth is very slow compared to other social media platforms for artists (this is much different that viral content which spreads like wildfire)
Recommended for artists who do tutorials, sketchbook tours, and time lapse videos
Utilize the platform's design by using the correct video settings, thumbnails, and annotations (there are plenty of videos describing how to do this)
Use descriptive titles. Add keywords in the description
Link to your other sites in the description of your videos (remember to use Bitly links for tracking!)
Watch other successful artists on YouTube and see what they do. They create high quality videos with interesting and helpful content.
Be interactive and answer every comment/question on your videos
Collaborations are super popular, reach out to other artists on YouTube and see if they want to collaborate! Make sure you have something to show them, either your own videos, portfolio, or accounts that show you're a real genuine person! Don't be offended if they don't trust you, after all it is the internet. But stay positive and interactive!
And another shoutout to @Kay Pike Fashion, who spent 12 hours creating those helpful diagrams at the top of this page, telling us everything she knows about social media!!
I personally struggle with social media, as I would much prefer to be painting or hiking than fussing with my phone or computer. But I have slowly realized the value for my business, and more recently started to take it seriously. I have seen much steadier growth since then, which has translated to steadier sales.
I hope this helps :)
Feel free to leave your comments and suggestions below!

Yes, you should visit Scotland. And you should go to Applecross.
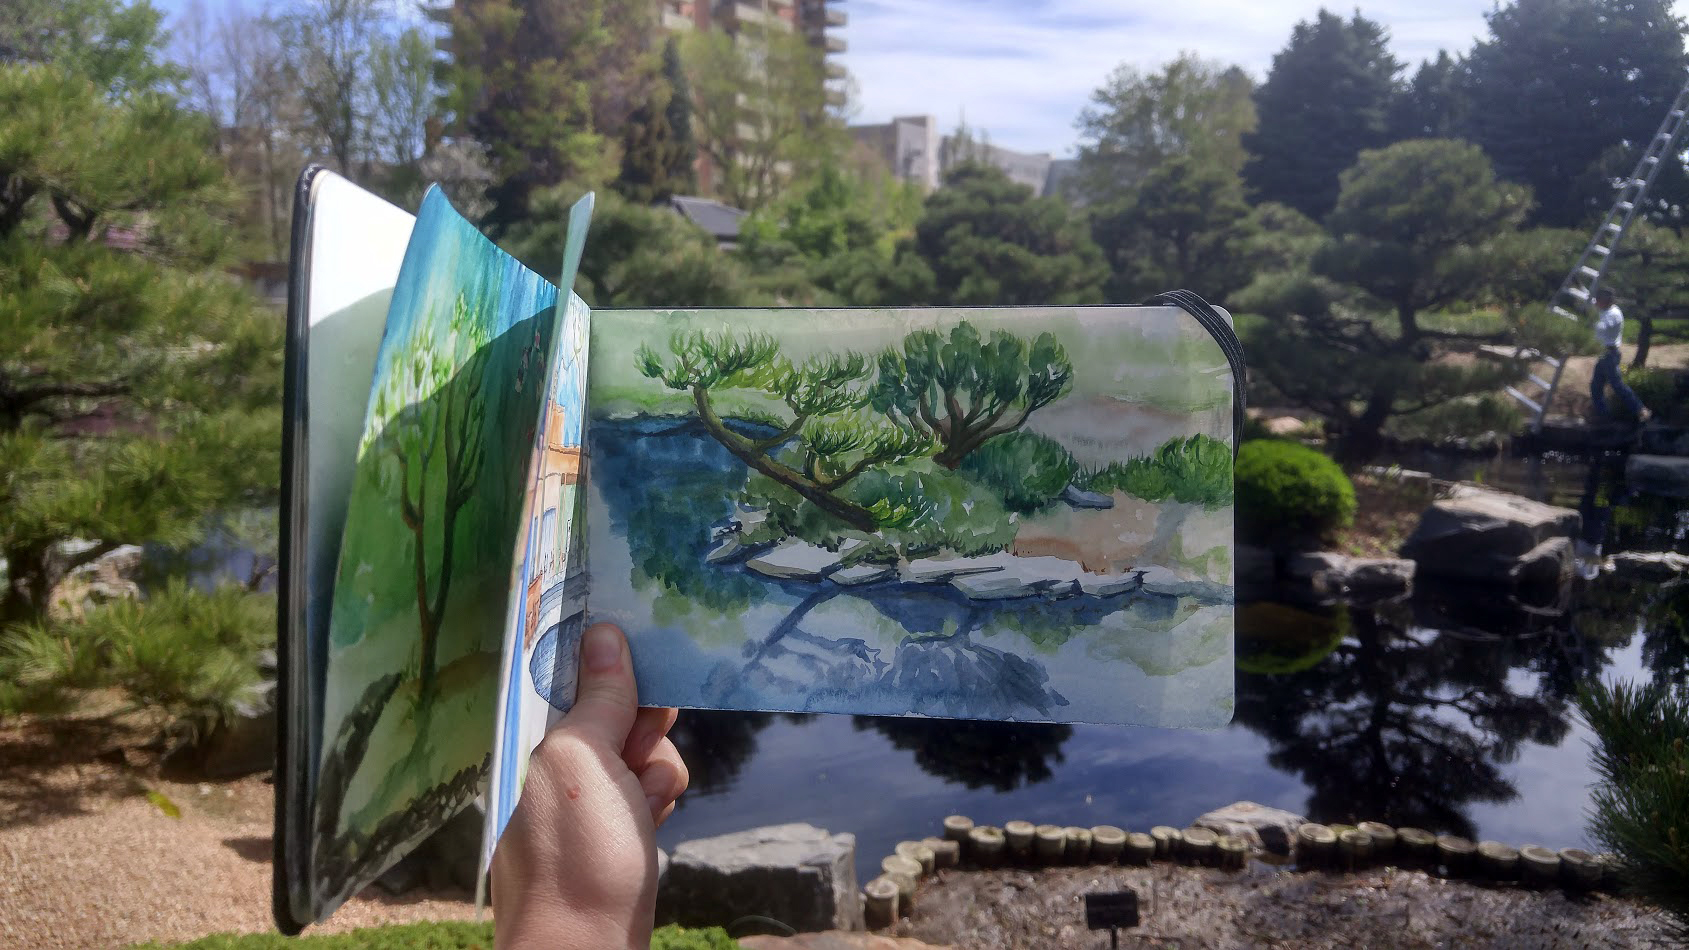
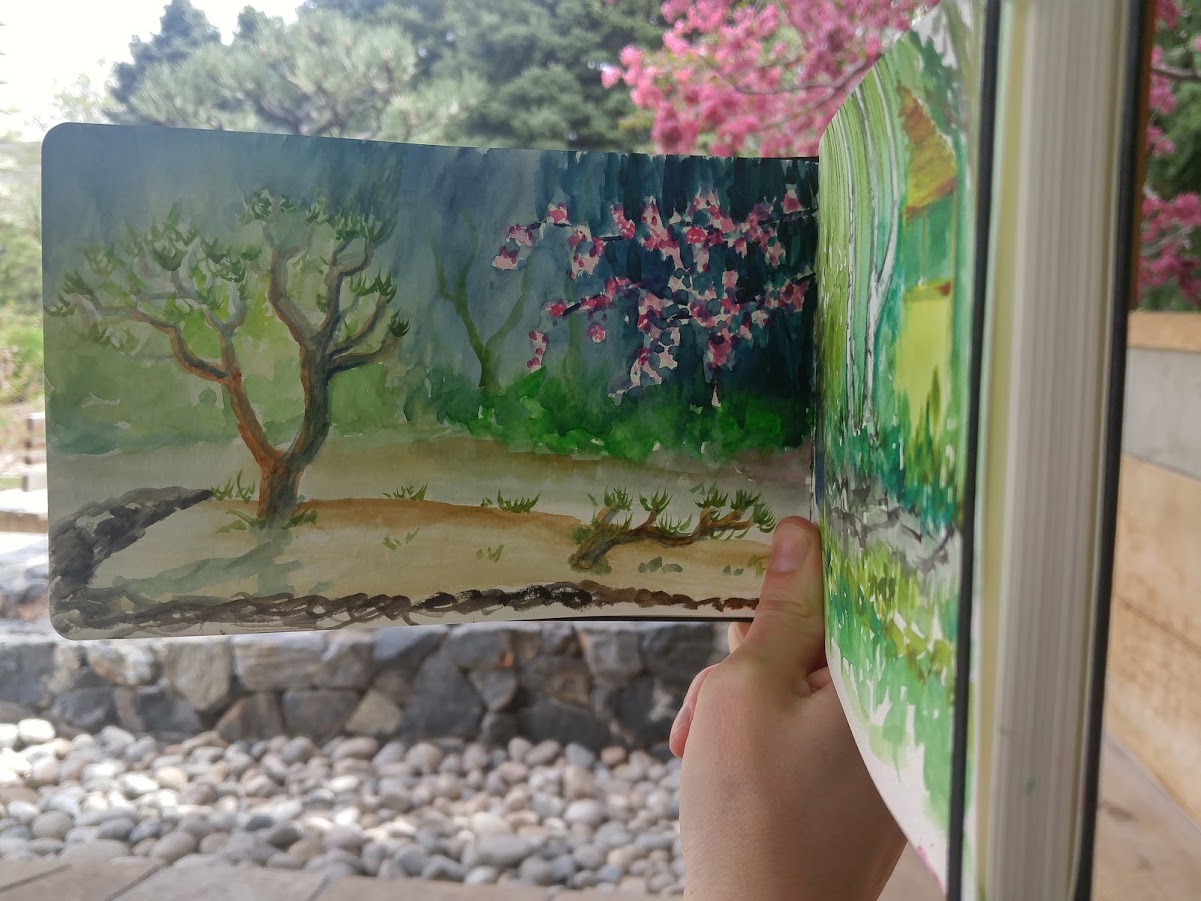
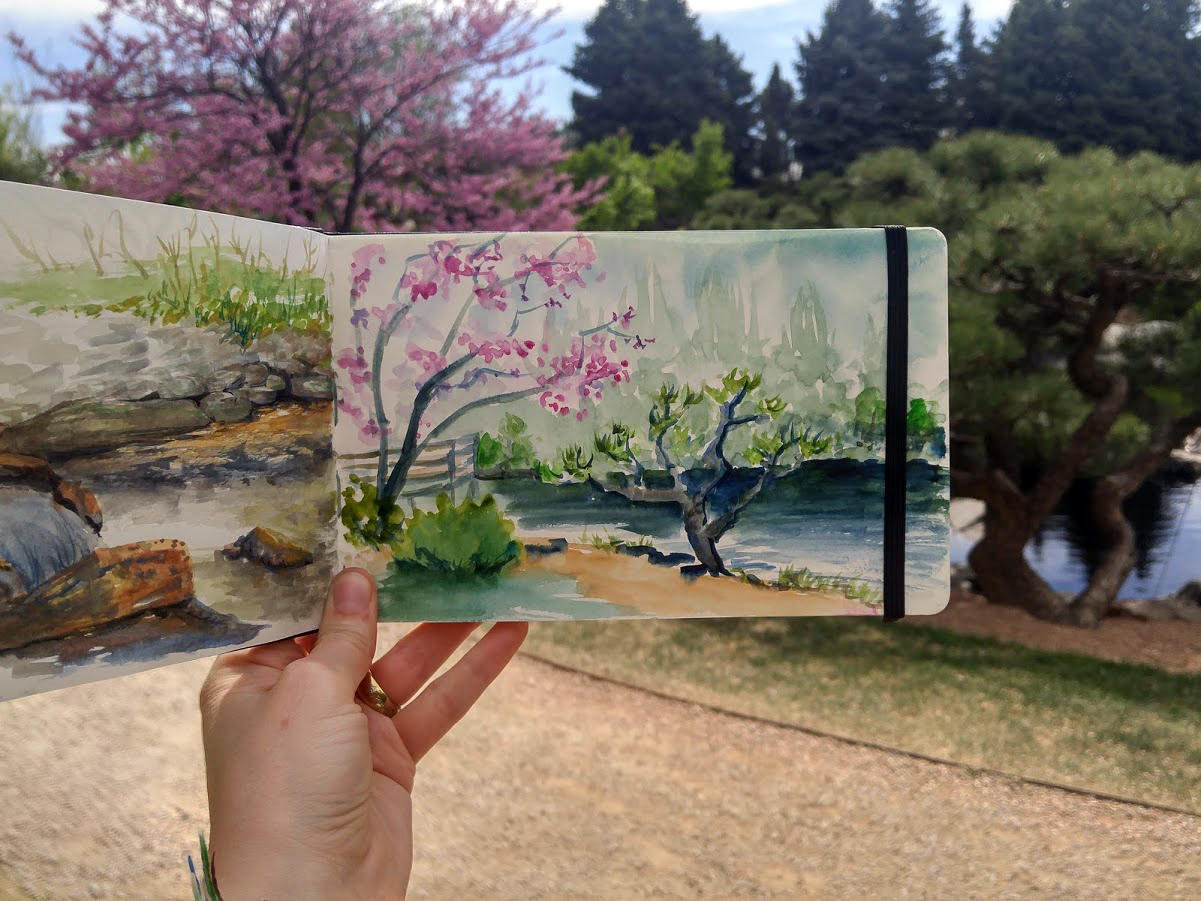
Read MoreNow that spring has sprung, I find myself giving up my snuggie and slippers for my sneakers and sunglasses.
I grab my sketchbooks, pens, watercolor travel sets, and just go.
Sometimes I don't know where I'm going, and I just walk until I find something that inspires me.
Sometimes I remember a cool building or sunny bench that I want to revisit.
The only constant is that I want to paint.
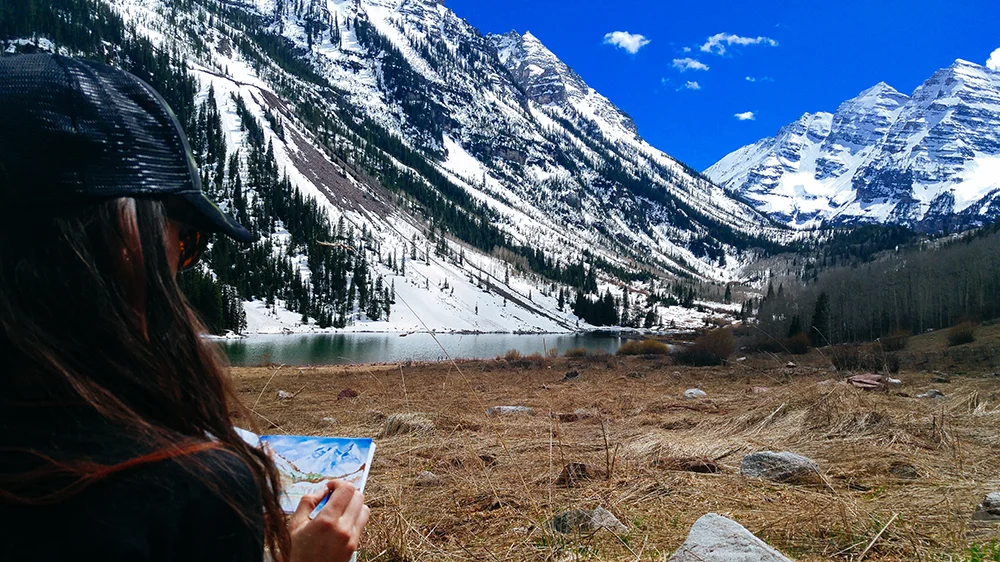
There is a huge difference in painting from a reference photo vs. painting from life. When you paint from a reference photo, everything is already flattened conveniently to a 2D surface that you can copy.
From life, your eye must decipher the depth, understand the shadows and highlights as the sun dances over the grass or through the tree limbs. This carries an added challenge, when you're trying to capture the scale, perspective, and colors of what you see! However, with just a little practice, it becomes much easier, and far more rewarding.
In my previous post I shared my Plein Air sketchbook tour, and talked about how meaningful the experiences were when I was painting.
Besides, there's nothing like a change in environment to get out of an artist block or a creative funk.
Time and time again, I find myself craving a good sketch/paint session, but have no clue what I want to make! So rather than fuss over it or overthink it, I simply GO!
Seriously, I just throw everything in my bag and leave my house.
This creates momentum. That momentum steamrolls any of my doubts or fears, and from there, its no longer about "I feel like sketching but I don't want to ruin my sketchbook or I don't know what to paint" and it becomes "where can I sit and start sketching?"
It may seem so simple and obvious, but that is the difference between a stack of blank sketchbooks and ones full of stories, experiences, and adventures!
Plein air painting/urban sketching has become as much a part of my work flow as answering emails.
This weekend I'm headed out into the Scottish highlands for a camping trip!
I ordered a GoPro so I can eliminate the tedious and inefficient process of filming my plein air sketching with my phone. Hopefully it arrives in time so I can test it out this weekend. I'm definitely planning on bringing my sketchbook and paint!
Howdy all! I am so excited to share this video, which is a sketchbook tour of my recently completed sketchbook! I started this Moleskin Watercolor Sketchbook in June, 2016.
I was JUST starting on my watercolor journey, so the first several pages of this sketchbook show my early learning process. I was not only painting in this sketchbook, I also did lots of work in my studio on nice watercolor paper. But I did take this out with me on my hiking and camping trips! So there are many special places captured in this sketchbook.
Many of you have been with me since I started my watercolor journey, and have seen me post photos of a lot of these on my Instagram. I post tons of sketches and such on there, so if you like that sort of thing, make sure you're following!
Good morning everyone! Here's my latest YouTube video which showcases my painting of Glen Nevis Gorge:
Glen Nevis Gorge, 22x15" watercolor on Bockingford Rough paper
The video is a narrated time lapse which includes tips and technique for how I painted this!
Enjoy! :)
People who follow me on Twitch know that I recently went through a 5 day internet blackout.
I felt so helpless and frustrated, and by the end I was really starting to worry about my business. I could barely connect to a signal using my phone, but when I did, I saw that I had Etsy orders and commission emails coming in. That is usually super exciting, but I need internet to run my business!
5 days might not sound like a lot, but when you go from being connected 27/7 on Email, Twitch, Discord, Instagram, Twitter, Etsy, Patreon, YouTube, etc... to suddenly have no connection is a shock to the system. Day after day I had no answer or hope from my ISP that internet would return, so I was just drifting along doing my best to stay occupied.
The silver lining is that I had a lot of time to reflect.
120 hours is a long time. Subtract 40 for sleeping and I still had 80 hours to fill over those 5 days.
At first, time went slow and I was grasping at straws. Every time I got an idea for something to do, I remembered it required internet. So finally, I did what any artist would do.
I created.
Within those 5 days, I ended up painting both commissions and studies, as well as doing some hiking & plein air painting.
I also decided to record all of it. I had a light-bulb moment that I could use my internet-less time to make as much video content as possible for my new Art-centric YouTube channel! GAME ON!
I ended up making 4 videos during the last 5 days, catered specifically towards instruction/education and inspiration. I made them specifically for YouTube so that I could start to build a library of helpful content for viewers. It was actually really fun - and kind of addicting!
Here's an example:
I used my 5 days as practice for what will hopefully be a routine. Eventually I'd like to regularly produce 2 videos per week. Now that I have internet again, and I'm back to my regular routine and streaming, I have less time to produce videos, but I now have a good strategy for using my time efficiently, and a better idea of what it takes to make these videos.
Upcoming videos:
- Watercolor Mountain - Narrated Time Lapse
- Medium Wars (Forest Scene) - comparing Watercolor/Gouache/Acrylic
- Plein Air Sketchbook Tour (Plus added narration/video of me painting in each location)
In addition, I've completely updated my Patreon Page, in order to better match my current and future artistic goals. The changes mean I'll be sending out less physical content each month, but providing more videos, process photos, and educational content more often, which is something people have been asking for.
Patreon is an amazing way for artists to support themselves, while offering exclusive content to their supporters.
Checkout my new intro video!
So, what started out as a disaster and worryfest, ended up being a period of reflection, production, and clarity for my business and goals.
I feel so incredibly motivated and inspired!!
I'm super excited to announce the launch of a new project!
This is my "new" YouTube channel that will be the home to weekly art-centric videos such as tutorials, sketches, and product demonstrations!
This is the first-ever video I've made specifically for YouTube, and I hope they will get better in time!
In an effort to synchronize my online presence and create a more efficient experience for my followers, I've decided to change my username for all of my social media accounts!
The new name matches my business name, Sarah Burns Studio.
New links:
Twitter: https://twitter.com/SarahB_Studio
Instagram: https://www.instagram.com/sarahburnsstudio/
Patreon: https://www.patreon.com/sarahburnsstudio
Youtube: https://www.youtube.com/sarahburnsstudio
Artstation: https://www.artstation.com/artist/sarahburnsstudio
Documenting your work is so important, whether you are a hobbyist or a full time artist. You use images for your portfolio, shop, and social media. Having consistently good images will put you and your work in a better light (pun)!
For those of us who are trying to build our business and make a living through our artwork, it's essential that we make it look as professional as possible!

First, decide between using a camera to capture your work or a scanner.
For me, that was an easy choice. I come from a photography background, so I already had the knowledge and camera required for good photos. But even more importantly, I often paint very large - sometimes up to 4 feet paintings, and those cannot be scanned!
If you want to scan your artwork, but you don't own a large scanner, you'll need to find a local print shop who can scan large artwork, and they have limits (and it can be pricey).
So this information is for anyone interested in photographing your artwork. This is MY process, and it may differ from other artists, but I hope it helps! Everything in my portfolio was a photo taken with my DSLR and cropped/adjusted in Photoshop after.
Anytime I say "canvas" I am referring to your artwork, whether it's a painting, drawing, or sculpture!
There are lots of factors to consider when documenting artwork, but lighting is the main challenge. Regardless of your equipment, if you don't understand what good lighting is, your photos will suffer.
USE NATURAL LIGHT WHENEVER POSSIBLE (But not direct sun)
Each type of light (natural, incandescent, LED, fluorescent, etc) has a different color or "temperature" (warm vs. cool)
Natural light falls in the middle, giving you a very neutral color and most accurately representing your artwork's colors.
Most of us have incandescent or warm LED bulbs in our home, which will cast a warm glow. If you absolutely cannot take photos using natural light, using the artificial light available to you is OK because color can be fixed in post production (to an extent). However what is not OK is low light, or using flashes that create a glare on the artwork. Sometimes, the glare isn't just a white reflection, but a color shift within your shadows. This can be hard to notice until you get into post production, and it's really annoying to fix!
To avoid reflections and glare on your canvas, you need to use indirect lighting. This means making sure there are no direct sources of light hitting your canvas. You can do this by angling your canvas in a certain position with your room. Fill the room with as much light as possible. Don't point light directly at your canvas. Begin angling the canvas and really look at the shadows. If you notice they are "lighter" than they should be or have a slightly different color, this means there's a glare and it WILL show up in your photos.
Keep angling until you find a position that works! Remember to avoid casting a shadow on the work from your body, camera or tripod (I rarely use a tripod).
Don't take the photo from a harsh angle (from the side). Position the camera DIRECTLY ABOVE the canvas, keeping in mind that you will need to crop the image. Cropping requires straight lines.
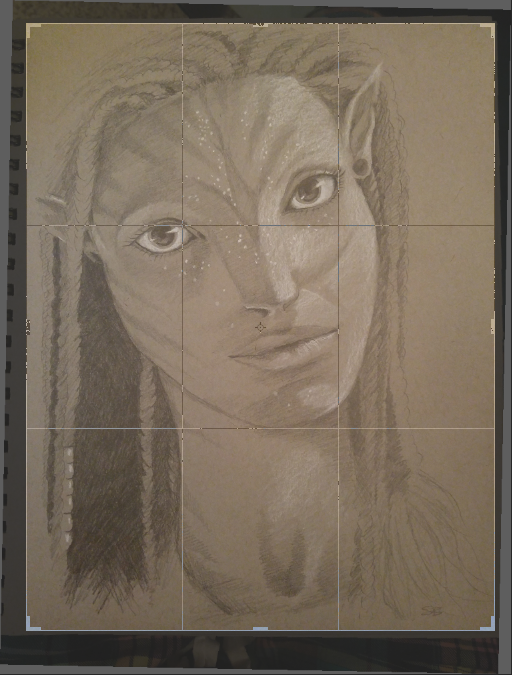
The following examples were taken with my phone (LG G4):
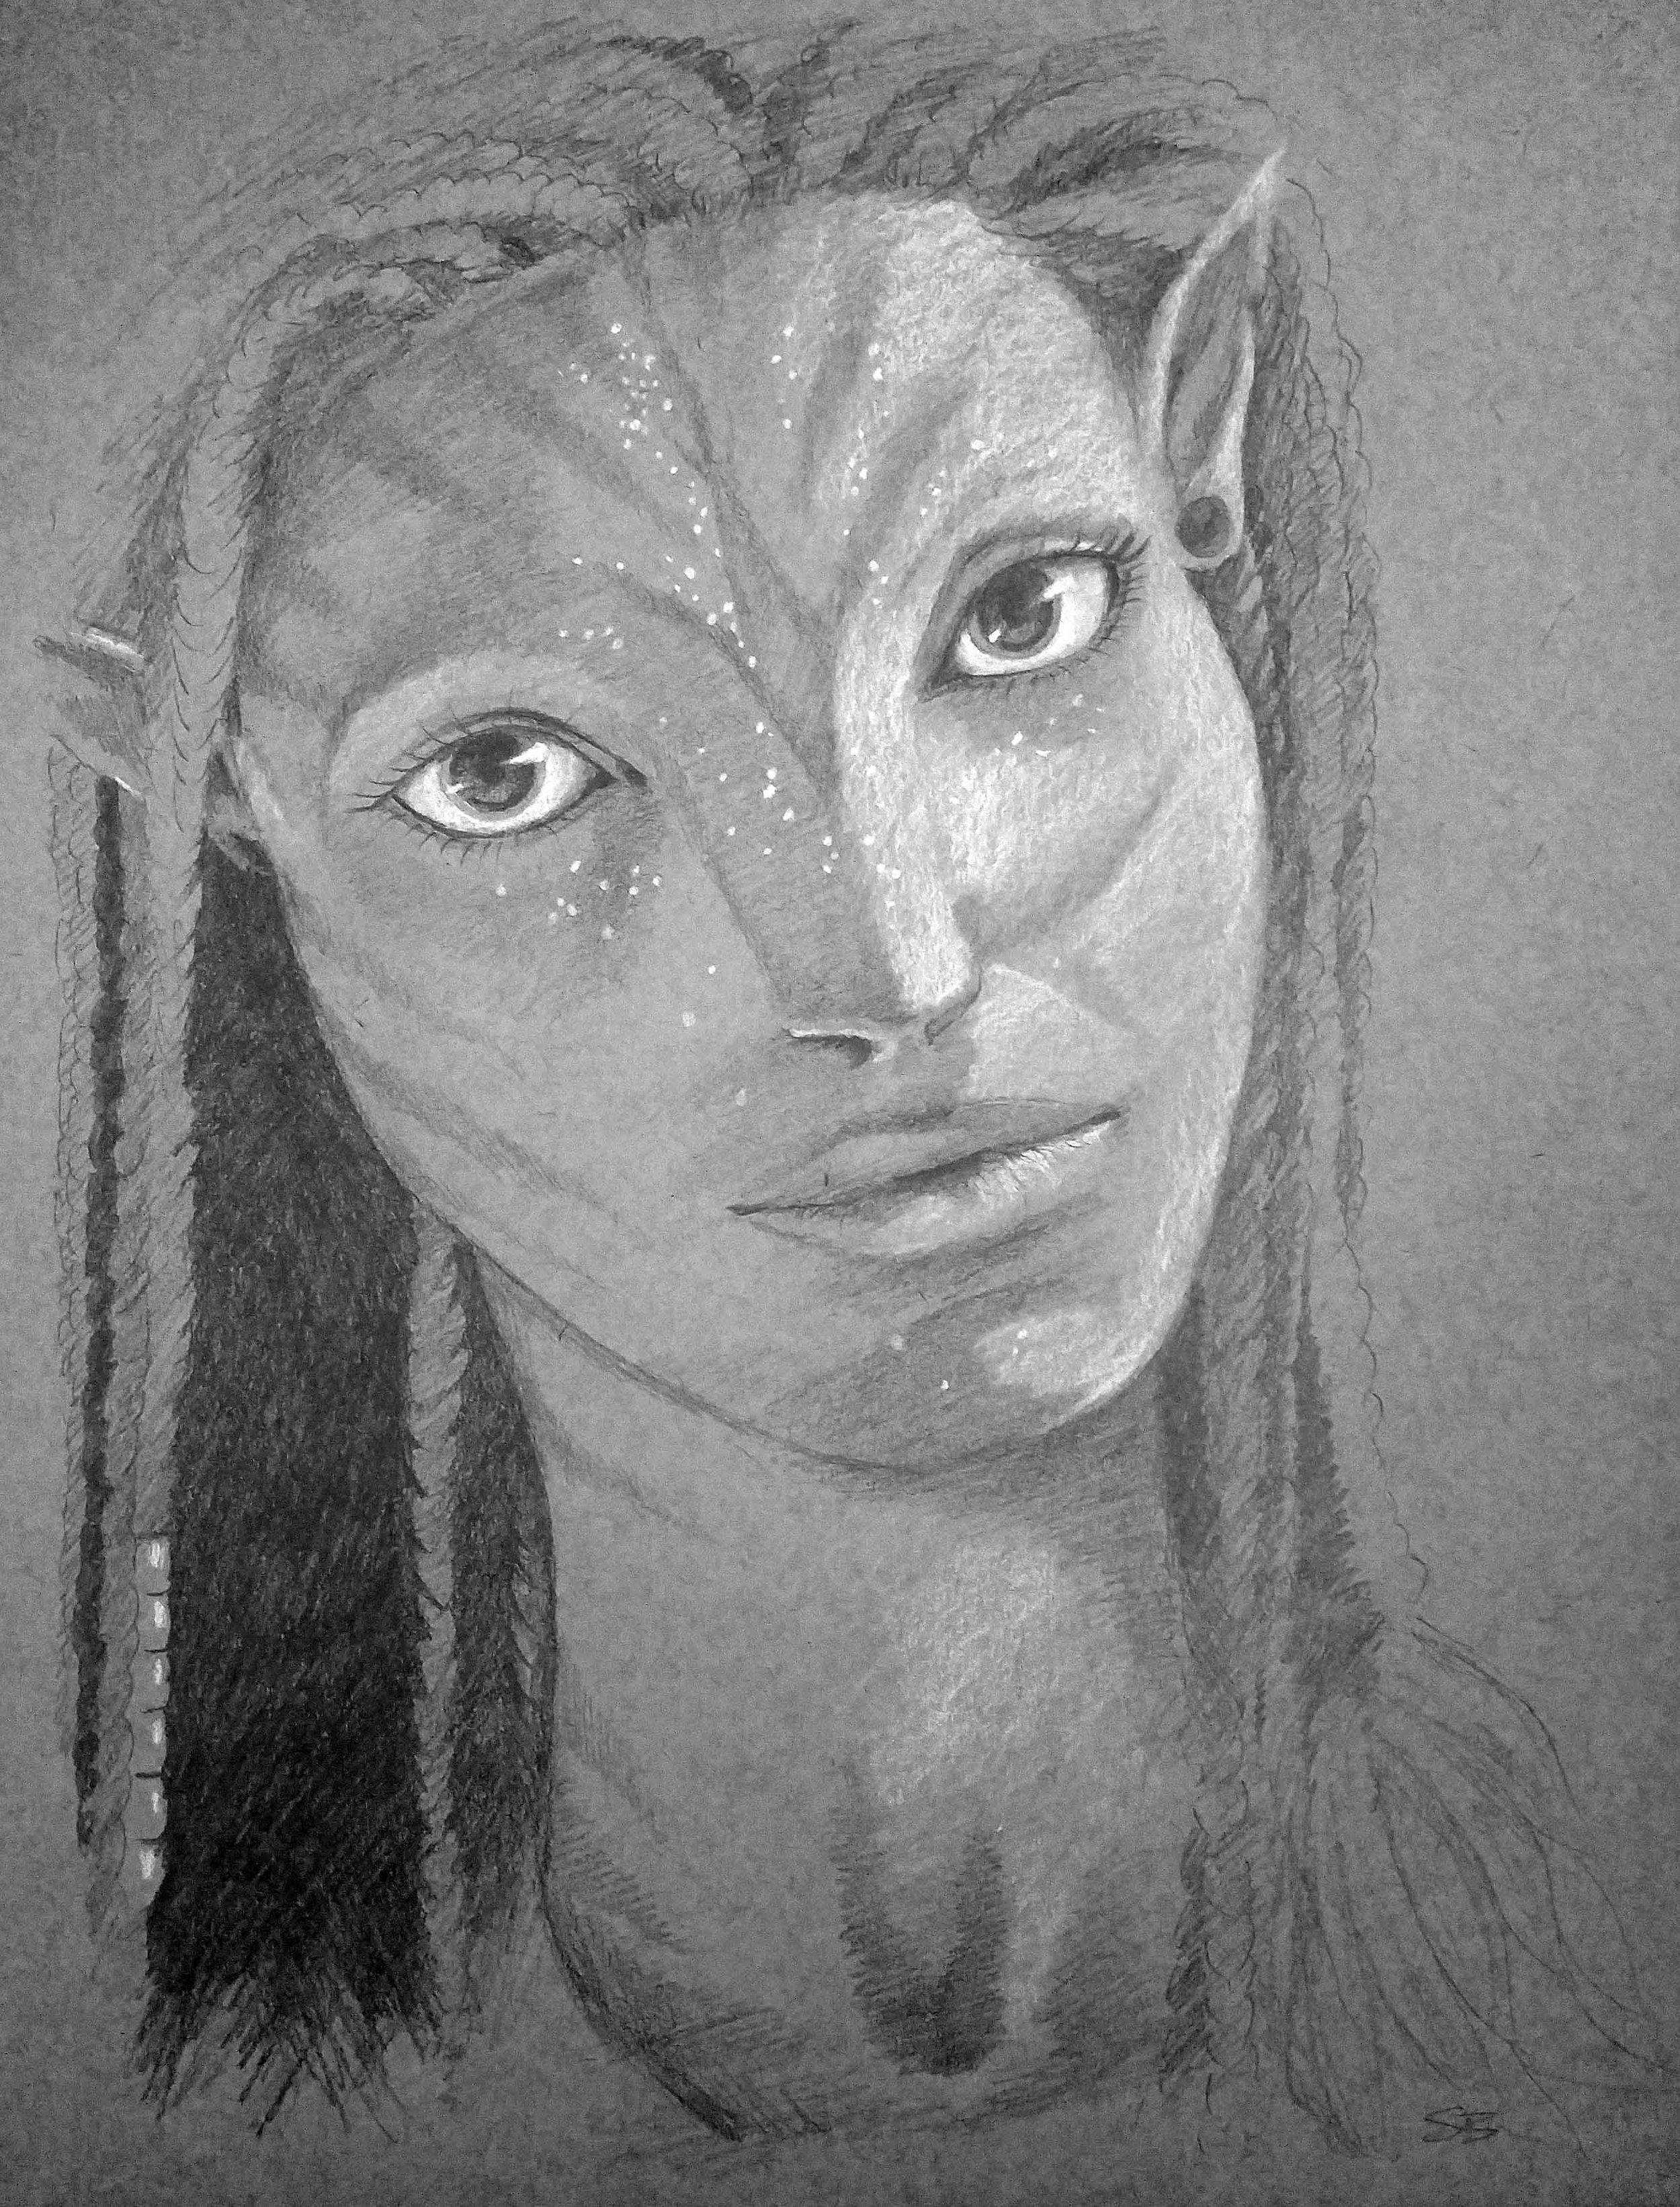
Final image after adjustments.
The last image shows what it looks like after being cropped and the contrast slightly increased.
This painting was not complete at the time, but I wanted to use it as an example because it had a variety of colors, contrast, and texture. These things were captured well with my phone and the final image is perfect for twitter or instagram, or even an online portfolio!
I always shoot in RAW format (not jpeg) whenever possible.
Most cameras, even point-and-shoots and some phones, have the option to change what file type your images are. RAW format allows you to adjust native settings of the image like exposure, white balance (color), and much more in post production, and it gives you a higher quality image.
Canon: In your camera menu, scroll to the "Image Quality" function and choose RAW.
Nikon: In your camera menu, scroll to "Image Quality" function and choose NEF (RAW).
Keep in mind this will increase your file size, sometimes up to 30mb per image. However it provides the purest, largest, highest quality image, which will allow you to make large poster size prints of your images later if you want!
If you don't have the option for RAW, use the highest jpeg setting available.
Use a high ISO in order to allow as much light into the sensor as possible. If your shadows are "grainy" that means you need more light in the room and a lower ISO (increasing the ISO too much will cause grain).
MAKE SURE THE PHOTO IS IN FOCUS! Stay as still as possible, and take the image directly from above so that every part of the canvas is in focus.
I have the LG G4 phone, and I chose it specifically for the camera. It allows manual settings as well as RAW format! It takes incredibly crisp images and does a great job handling low light.
You can take perfectly decent photos for your portfolio and social media with your camera phone.
(See above examples)
The area that it lacks is usually resolution/file size. If you plan on selling high quality prints of your work down the line, you'll need very high resolution, large files which phones don't always provide. Just keep that in mind.
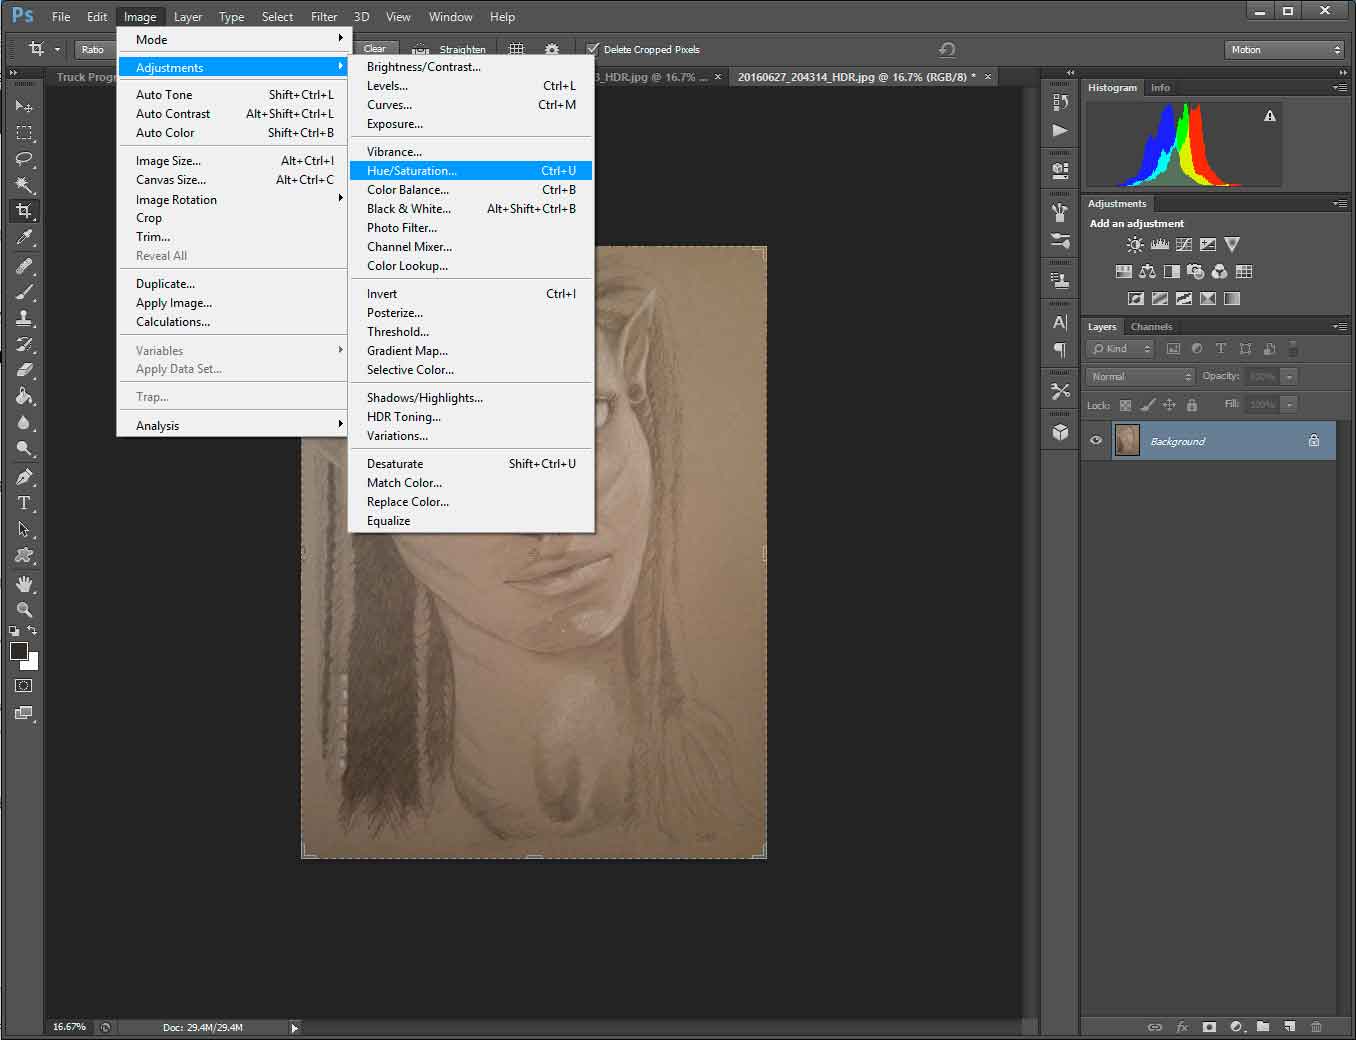
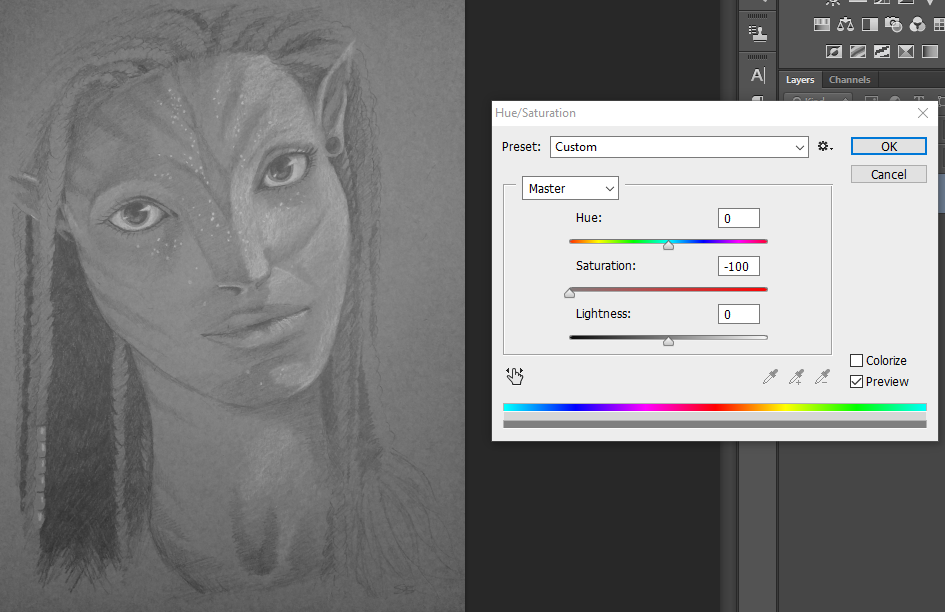
After you take the photo, you will need to make adjustments and crop the image to match the borders of your artwork.
I use Photoshop CS6, but you can find other photo editing software out there. Just make sure it allows you to edit RAW images if you use that setting.
When you open a RAW file, it will first open in Adobe Bridge. This allows you to adjust the native settings of the image like exposure and color. If you have a jpeg, open it directly in Photoshop or whatever software you have. You can still adjust these settings in a jpeg to an extent.
The main things I do are:
Like I mentioned before, a lot of times using a phone to capture images of your work for social media is perfectly fine, just try to keep lighting, angle, and quality in mind! The more you post consistently good quality images, the more your work will attract others. Posting poorly lit, horribly yellow, or grainy photos of your work just makes the art and your brand look BAD! Give yourself the best chance possible by taking a little extra time and pay attention to the details.
Progress Pics are an excellent way to show off the unique aspects of a medium, whether it's painting or drawing, or whatever! People love progress pics!
Instagram currently offers the choice to upload multiple images to one post, so you can show individual progress photos or closeups of your piece.
Note: For the multiple photo feature, the app auto-crops them to a square, so make sure you take the image from far enough away/the correct angle to fit within a square.
Twitter allows you to upload 4 images at a time, which is also an excellent way to show details or progress shots.
You can also have fun and get creative with your compositions.
Multiples or closeups don't have to be boring!
If you have any specific questions, please message me or leave a comment below! I'd love to help you reach a level of quality you are proud of!
Sometimes being overwhelmed makes you feel very isolated. In this post I talk about my experience.
Read MoreI took a trip to Skye this past weekend for my birthday, and decided to capture some of it so I can share it with you call! It's my favorite place in Scotland!
Enjoy!

"But in the end it’s only a passing thing, this shadow; even darkness must pass." – Samwise Gamgee
You know that feeling when you're starting to learn a new skill, and even though you understand the premise of how to execute the skill, your body just can't quite do it?
For instance, shooting a bow. You understand you must raise the bow, aim the arrow, pull back on the string, and release. You hope it hits the target in the desired spot. However, you quickly realize there are so many tiny nuances to achieving your goal. Angle, strength, even wind can factor in to the outcome. It cannot be perfected without hundreds - if not thousands - hours of practice.
The same goes for art.
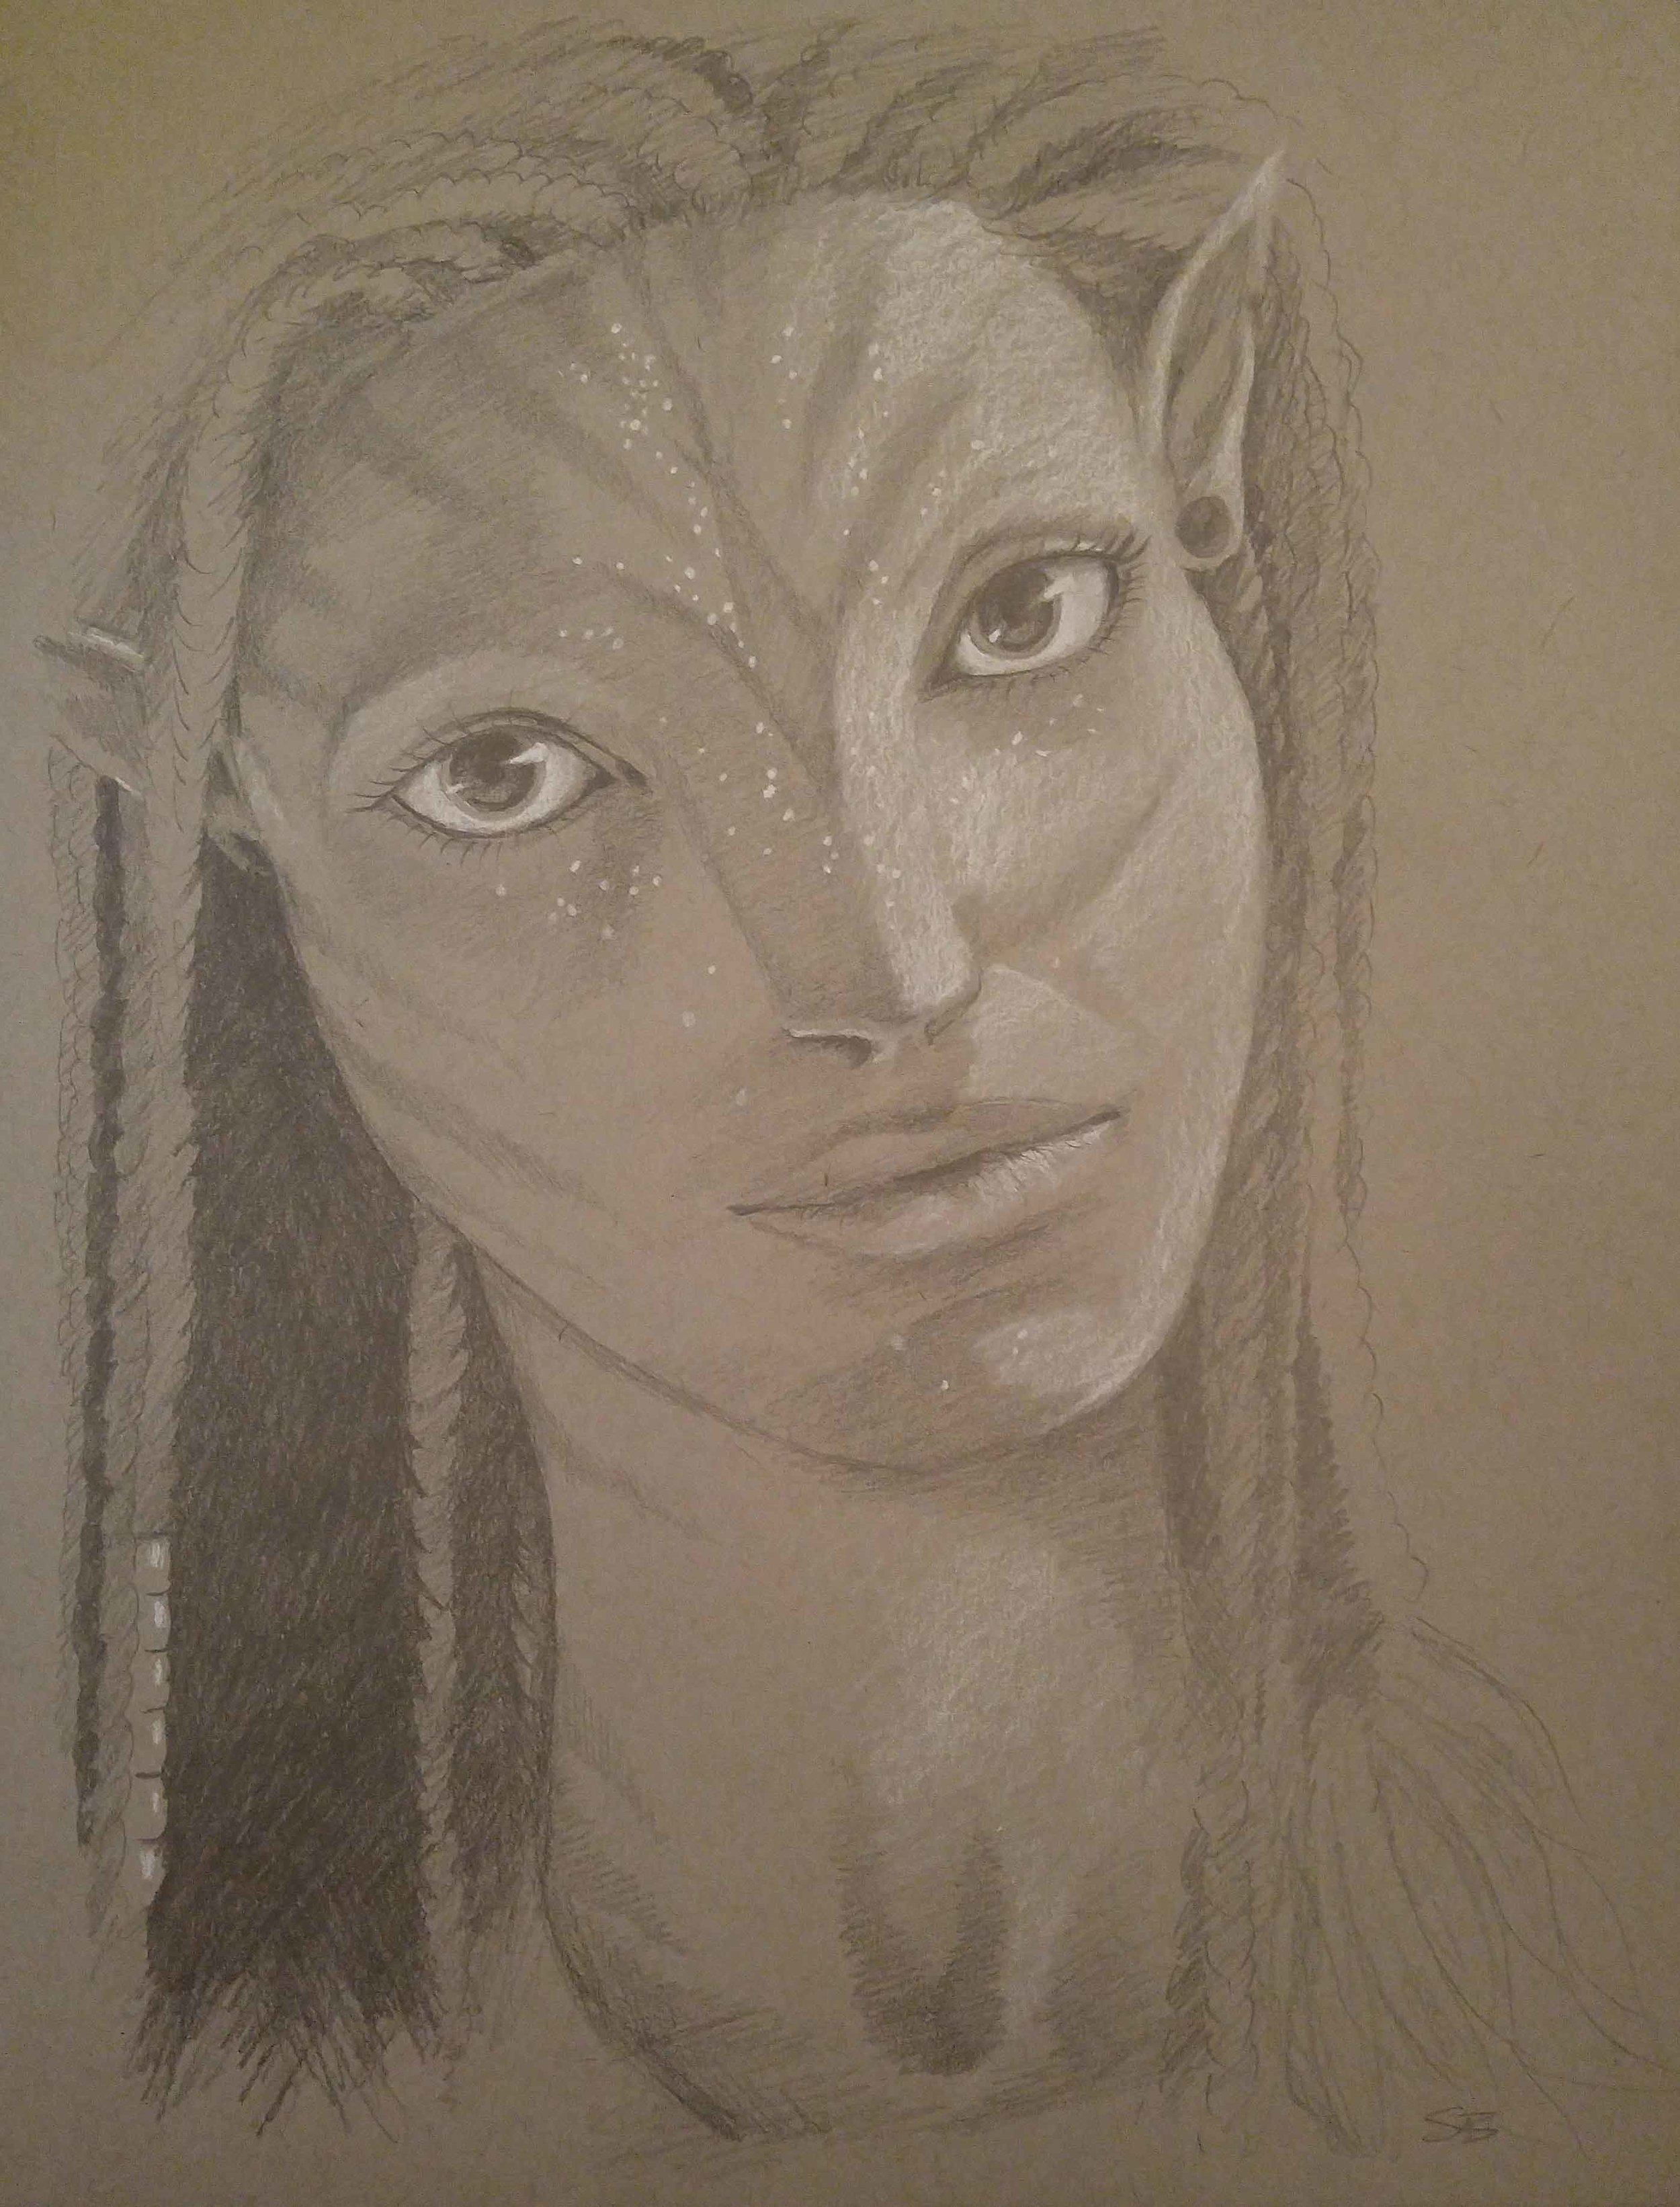
Learning how to manipulate paint on a canvas, or how to sweep graphite over the paper to a desired outcome is a skill.
It's not an innate talent you are born with. With enough hours and dedication, you can learn how to paint something like this:
"The Fellowship of the Ring - Descent from Caradhras" by Donato Giancola (oil on linen)
It may be a long and sometimes tedious and frustrating process. However that doesn't mean it's not an enjoyable process! It's going to be filled with tiny failures and successes.
Remember: mistakes are your FRIEND!
We learn from our mistakes.
I frequently hear new artists say "it feels like I'm not getting any better."
If you are practicing, especially daily, you ARE getting better. Your progression may not be noticeable (to you) because you have an idea of what skill level you want to reach, and that is clouding your judgement.
If you truly want to make progress, you need to take an active role in your progression! This means that every single time you draw/paint something, you give it a proper look and do a quick "lessons learned" session. What is good about it? What is not good? Where do you feel like you struggle the most?
The more you do this, the more you'll be present during the creation, and be able to see your true mistakes, learn from them, and eventually get over them.
It doesn't happen immediately, but it will happen.
No matter what, don't compare yourself to other artists. That will only lead to that pitiful "I will never be able to do that" feeling. I'm just as guilty of this - but once I'm aware that I am doing it, I snap out of it and continue on my own journey.
Do you have any tips/advice for new artists? If so feel free to leave them in the comments!
A long time ago in a galaxy far, far away...
Blow out the candles!
Read More